
Return to: Jim's Goldwing page.
I took all the pictures using my digital camera at the 4 mega-pixel setting. The page includes thumbnail versions of the pictures. But I chose to make the thumbnails pretty large themselves. The thumbnails are 400x300 at 75dpi resolution. In many cases this picture itself will be big enough for your use.
But, you can click on any picture and the full size version will load. If you have a DSL or cable connection this should not be a big deal, but if you have dial-up, go get a cup of coffee.
I saw instructions on how to make a home made motorcycle trailer using a Harbor Freight utility trailer and a Sears car-top carrier.
I've seen on the internet some good looking ones. While mine isn't so good looking, it works well and meets my needs.
|
|

|

|

|

|

|

|

|
|
|
I've been running at 25 psi. The outside doesn't show much wear. But I'm satisfied with this pressure anyway. |
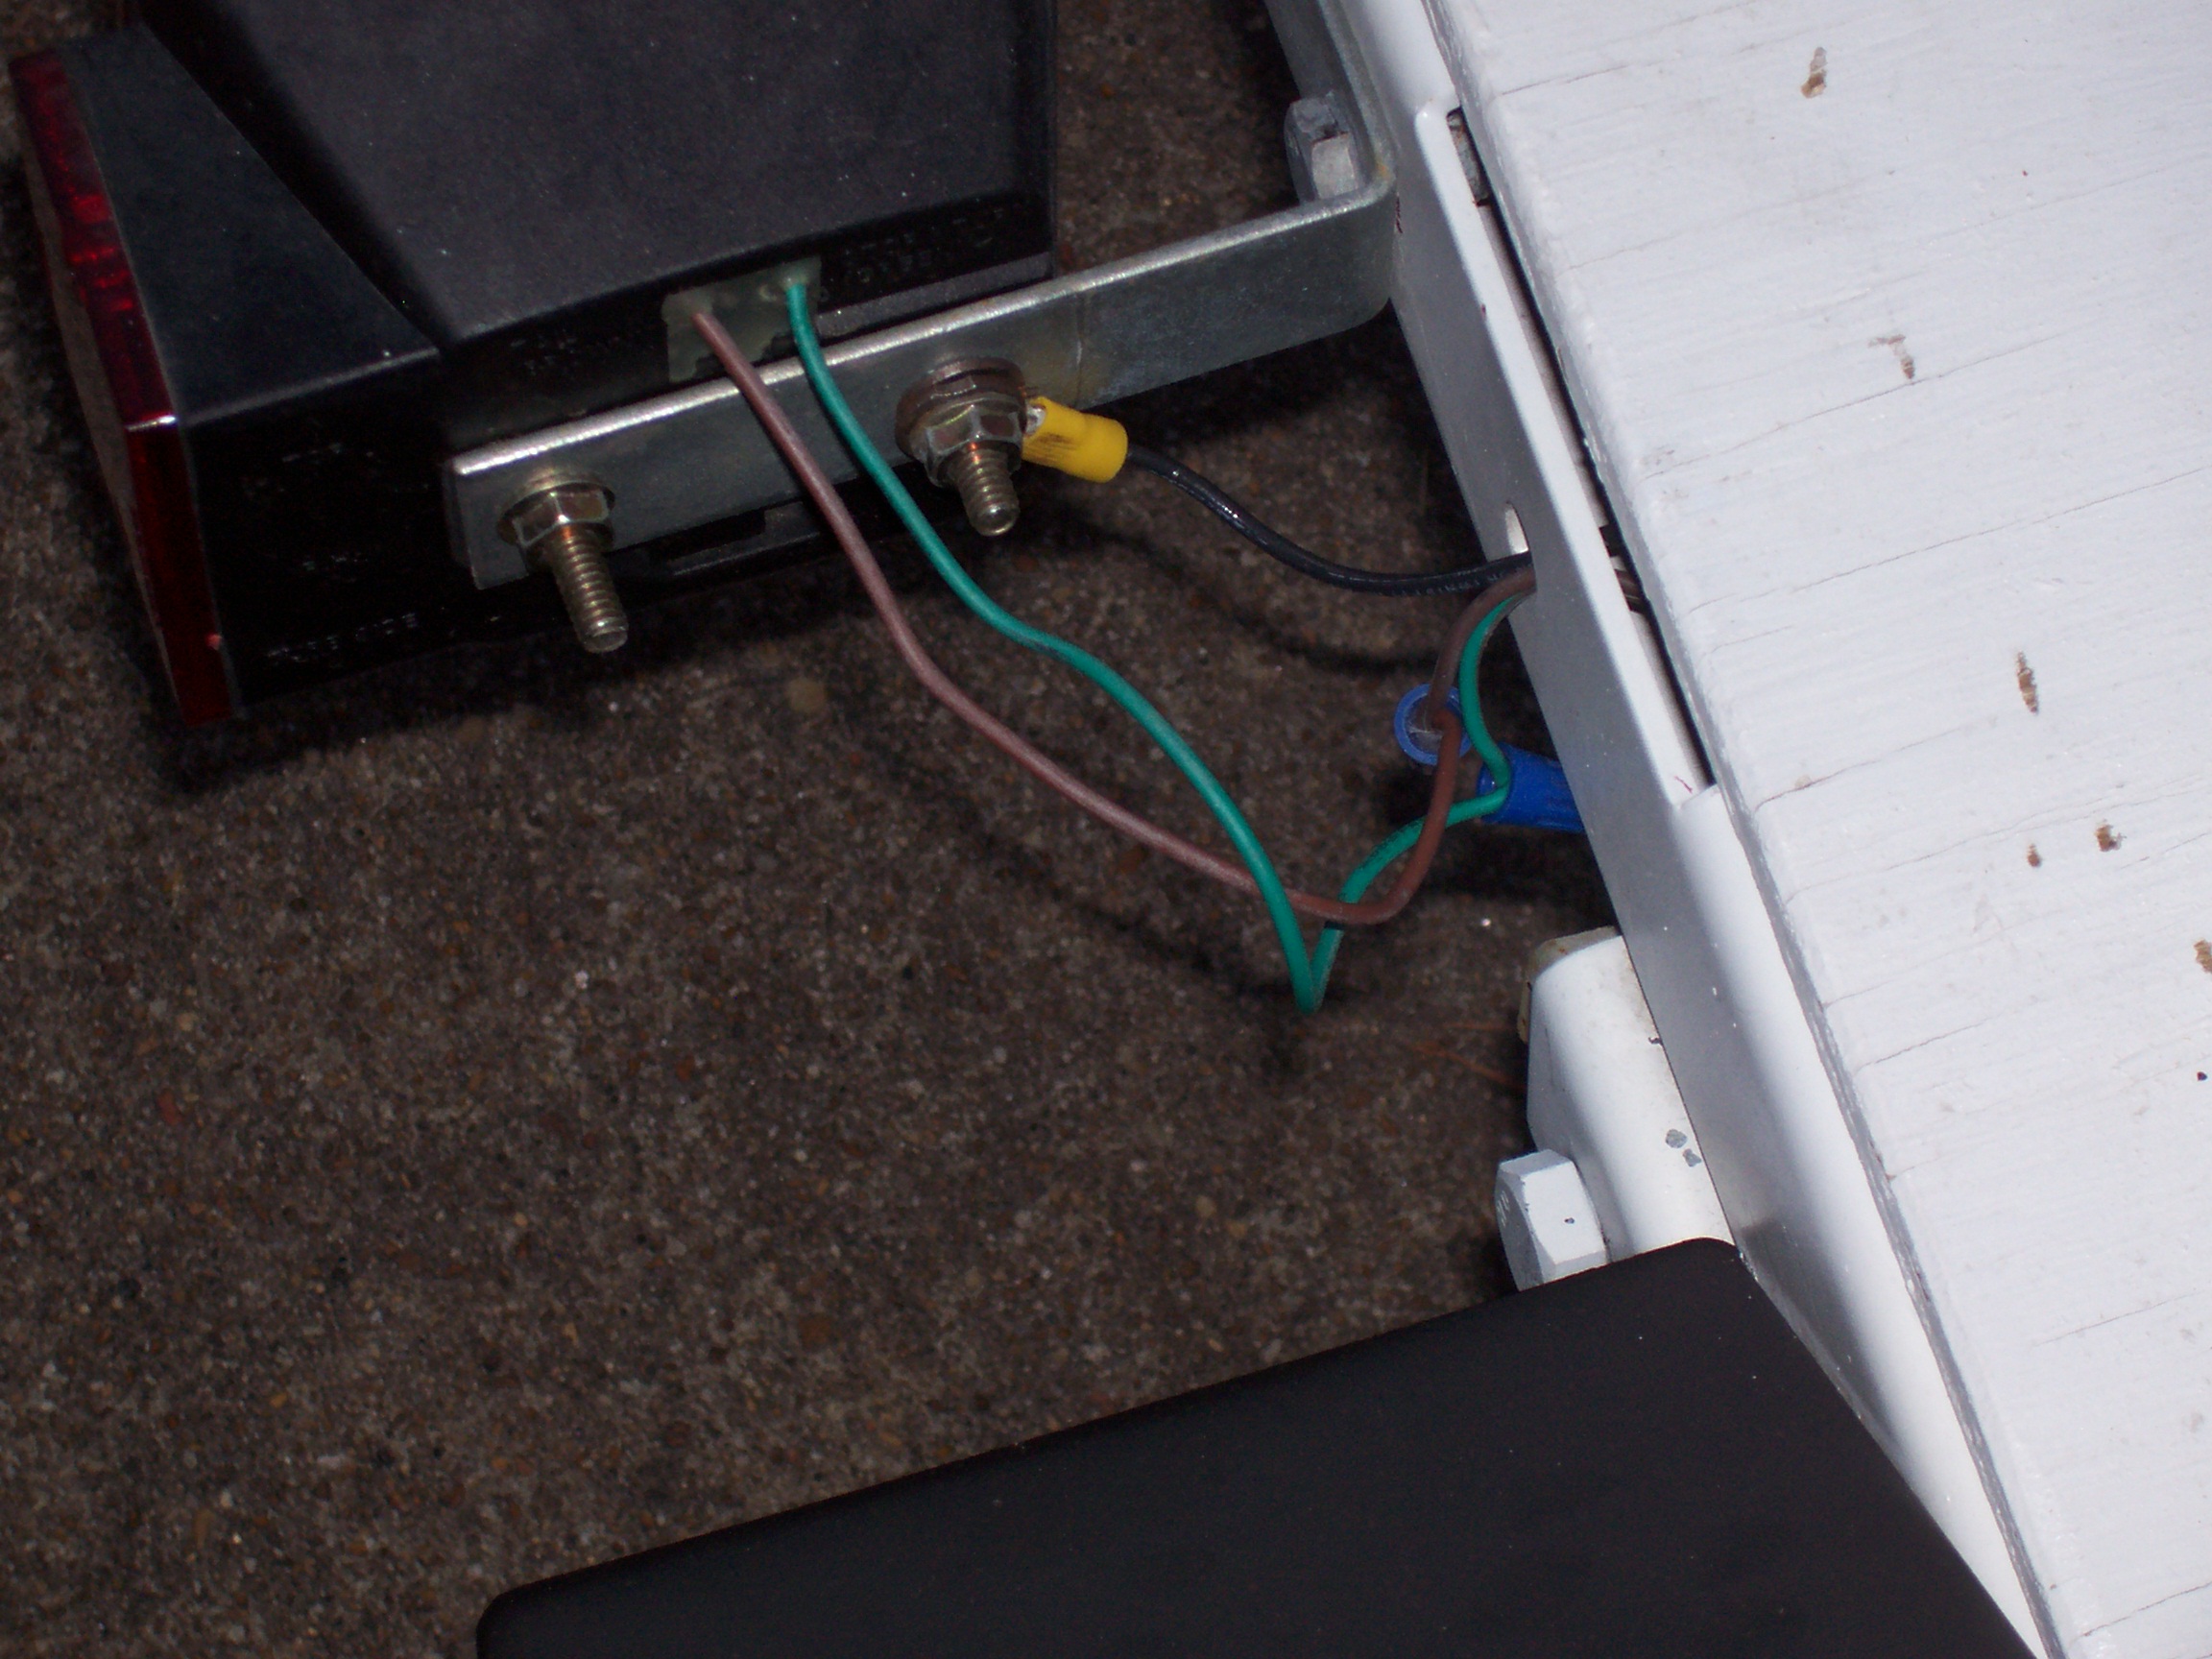
The trailer doesn't ground well. I assume that it's from my paint job. I added a wire all the way around. The black wire is for the ground. |
I painted the frame white to match the bike, but it's cheap spray paint. So it looks ok, but not great. I used rattle can paint. I'm not very good so it doesn't look as good as what most people would want for their trailer to look like, but given the double duty use I put my trailer through, it give me the advantage of being able to repaint and cover up any scrapes and scratches quick, easy, and cheap. I tried to paint the car top carrier, but it won't hold paint, so I removed it. You can still see the traces of paint on it. I'm going to retry the paint again later, but this is how it is right now.
This is one great advantage of using the Harbor Freight trailer. As much as I ride my motorcycle, my other vehicles don't get much use. The last year I owned my pick-up truck, I put only 300 miles on it the entire year. And each time I wanted to use it, I had to break out the battery charger. When I got my trailer, I decided if I put a hitch on my car, I could use the trailer for most of what I use the pick-up for, and eliminate the need for the truck. I sold the truck and haven't had any need that was bigger than the trailer yet. So my trailer pulls double duty.
When I use it behind the motorcycle, I put the car-top carrier in place and I have the enclosed place needed for travelling.
On the other hand, if I need to make a utility trip such as to the Lowe's or Home Depot, or the land fill, I can pull it behind the car. I remove the car-top carrier and I can strap things down to the flat bed. I added a hitch to my VW Beetle (the new style Beetle). Many people are surprised to see a hitch on such a small car, but it does quite well. And the way I see it, if a motorcycle can pull it, then it should be easy for the car.
I've done several small trips and a couple of big ones on the motorcycle, so I probably only have about 3000 miles or so behind the bike but I haven't had a bit of trouble.
In addition, I've probably used it about 20 or 30 times locally behind the car.
A lot of people talk about modifying the trailer to make it pull better, such as lengthening the tounge or cutting a few inches out of the trailer to make it narrower. I haven't made any modifications at all. Mine tracks very well behind me and it's in the stock condition. I haven't removed any of the leaf springs, although a lot of people recommend that too.
Proper tongue weight is very important when pulling a trailer, and since it can cause handling problems, it is even more crucial when behind a motorcycle.
I've heard two different recommendations regarding tongue weight:
First: it should be about 10% of the load weight. So if you are pulling 500 lbs, your tongue weight should be 50 lbs.
Second: it should be approx 30 - 50 lbs. Ok, that would match the above for a load weight of 300 to 500 lbs. But outside that range, it might still make sense.
In my experience there is some flexibilty in the needed weight. There must be some bit of positive weight on tongue. Too much weight behind the rear axle and it's possible to affect the steering at the front of the bike.
I know people that use a spring scale and measure the tongue weight. I haven't done that. I've estimated each time and with good results. After loading the trailer, I pick up the tounge and estimate that it has a good weight on it by feel. This has always worked out fine, with only two exceptions.
1) I went to Home Depot one time to pick up some lumber. A few pieces of 2x8 pine. It was a nice day so I pulled the trailer behind the bike (for fun). I strapped it down to the trailer but it was long enough that there was actually negative tongue weight. I couldn't shift the wood any further forward, so I was stuck with what I had. On the way home, the trailer wagged back and forth quite a bit, and I really felt it in the handlebars. I had to go home very slowly. Now I know better.
2) On a recent trip, the trailer was loaded out with all my stuff, and I thought I had the weight pretty well distributed. I felt some tongue weight when I picked it up. But as I rode along I got an occasional shake in the handlebars. I'd go a few miles without any problem and then I'd experience a slight shake, then it would be fine for several more miles, then it would happen again. After about the fourth time, I decided that I had to do something about it. I stopped and shifted a couple items in the trailer. I just swapped a couple things around, looking for something in the back that was heavier than something in the front and swapped places. It solved the problem and not another shake the entire trip.
I have heard a lot of opinions about tire pressure. In general the max tire pressure is 60 psi, but that is for carrying the max load that the trailer is capable of handling. That kind of load is way beyond the load that anyone pulls with their motorcycle. If you run too much pressure in the tires, the trailer will bounce a lot more, and it will cause the tires to wear prematurely. You will experince wear in the center and the edges of the tire won't touch the road.
Most people I talk to usually settle on about 25 psi. There are a couple methods to try to determine the right pressure. One is to load the trailer up with the weight you plan to carry, and then roll the trailer through a puddle of water and then on to dry pavement. Look at the tire print left behind. If you only see the center of the tread leaving a mark, let some air out. If you see the edges leaving a print, add some air. Another method is to put chalk on the tire and roll it. Then pull the trailer until some of the chalk wears away. Look at the tire, and if the chalk is gone in the center, let some air out, and likewise if the chalk is gone on the edges add some air.
But here's where I stand now: I ended up with about 20 psi in my tire, and I could have let more air out. But I got talking to another person who suggested to me that if you reduce the pressure too much, you may risk hitting a bump and the tire coming unseated from the bead. His opinion was that it was better to wear out a tire early than to get stuck on the side of the road with a tire that came off it's bead. Considering that you can pick up a replacement 8" tire for about $15, his logic made sense to me. So I settled on 25 psi, and that's what I keep my pressure now.
The wiring gave me a little bit of trouble. Just like in a vehicle, the ground is through the metalwork of the body/chassis. I don't know if it is because I painted it but it won't ground. I would have to assume that the paint that is used from the factory conducts electricity and the spray can paint that I used doesn't, at least not very well. I painted mine in pieces before I assembled it. Then when I assembled it, at first everything was fine, but then one of the tail lights quit working, then the other. But then the first one started working again. I could never get consistant operation. So I ended up running a wire all the way around the trailer to use for the ground. I connect it to each of the lights. Now the lights work fine.
Originally I bolted the car top carrier down. But because of how often I remove the car-top carrier, I now use a pins with cotter pins. It makes it much easier and faster to remove the carrier.
The trailer is $190 but is frequently on sale for $150 or sometimes less. It is Harbor Freight part number 42708-8VGA.
The Sears car-top carrier is their basic model, it was about $125. (I don't remember now the exact price).
I used a piece of plywood for the deck. I bought some extra nuts & bolts to bolt the plywood in place, and some small nuts & bolts to bolt the car-top carrier in place. I needed some spacers to put between the car top carrier and the plywood due to the shape of the car-top carrier. I cut some squares of plywood out of scrap pieces and drilled a hole in the centers.
Add in the spray paint, and I think I have about $300-$325 in it.
Return to: Jim's Goldwing page.
Click here to E-mail me.