Return to: Jim's Goldwing page.
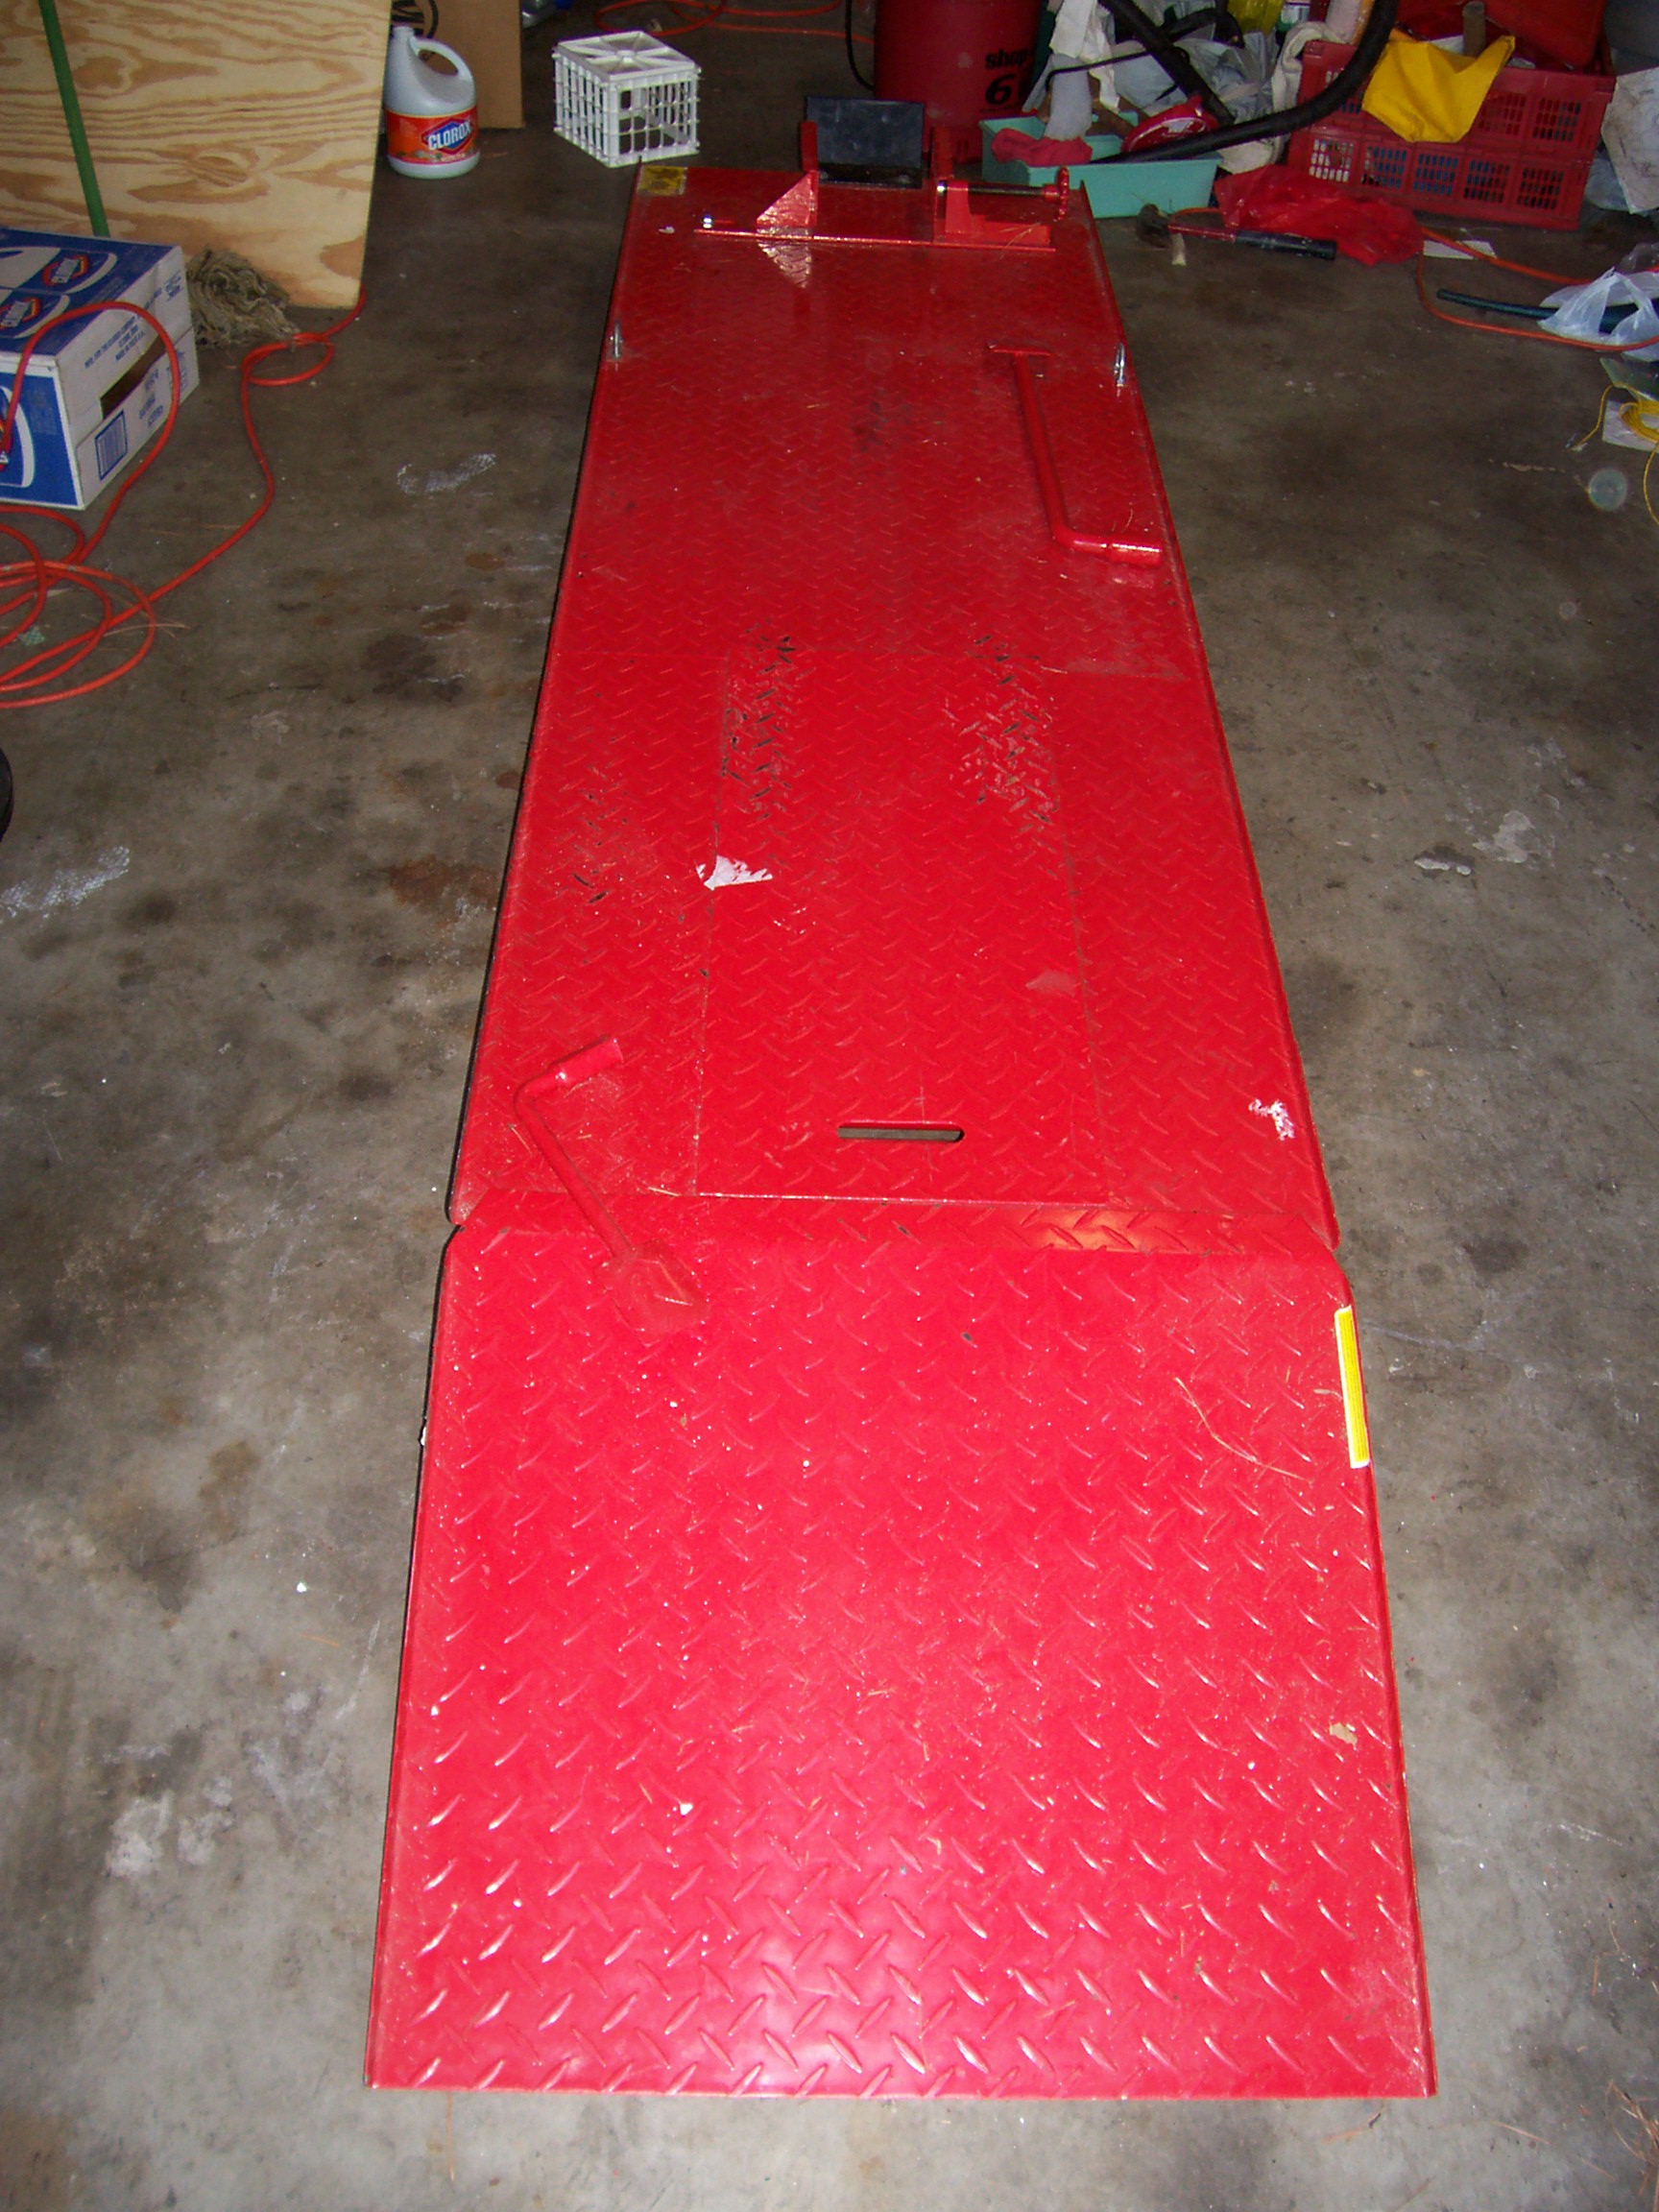
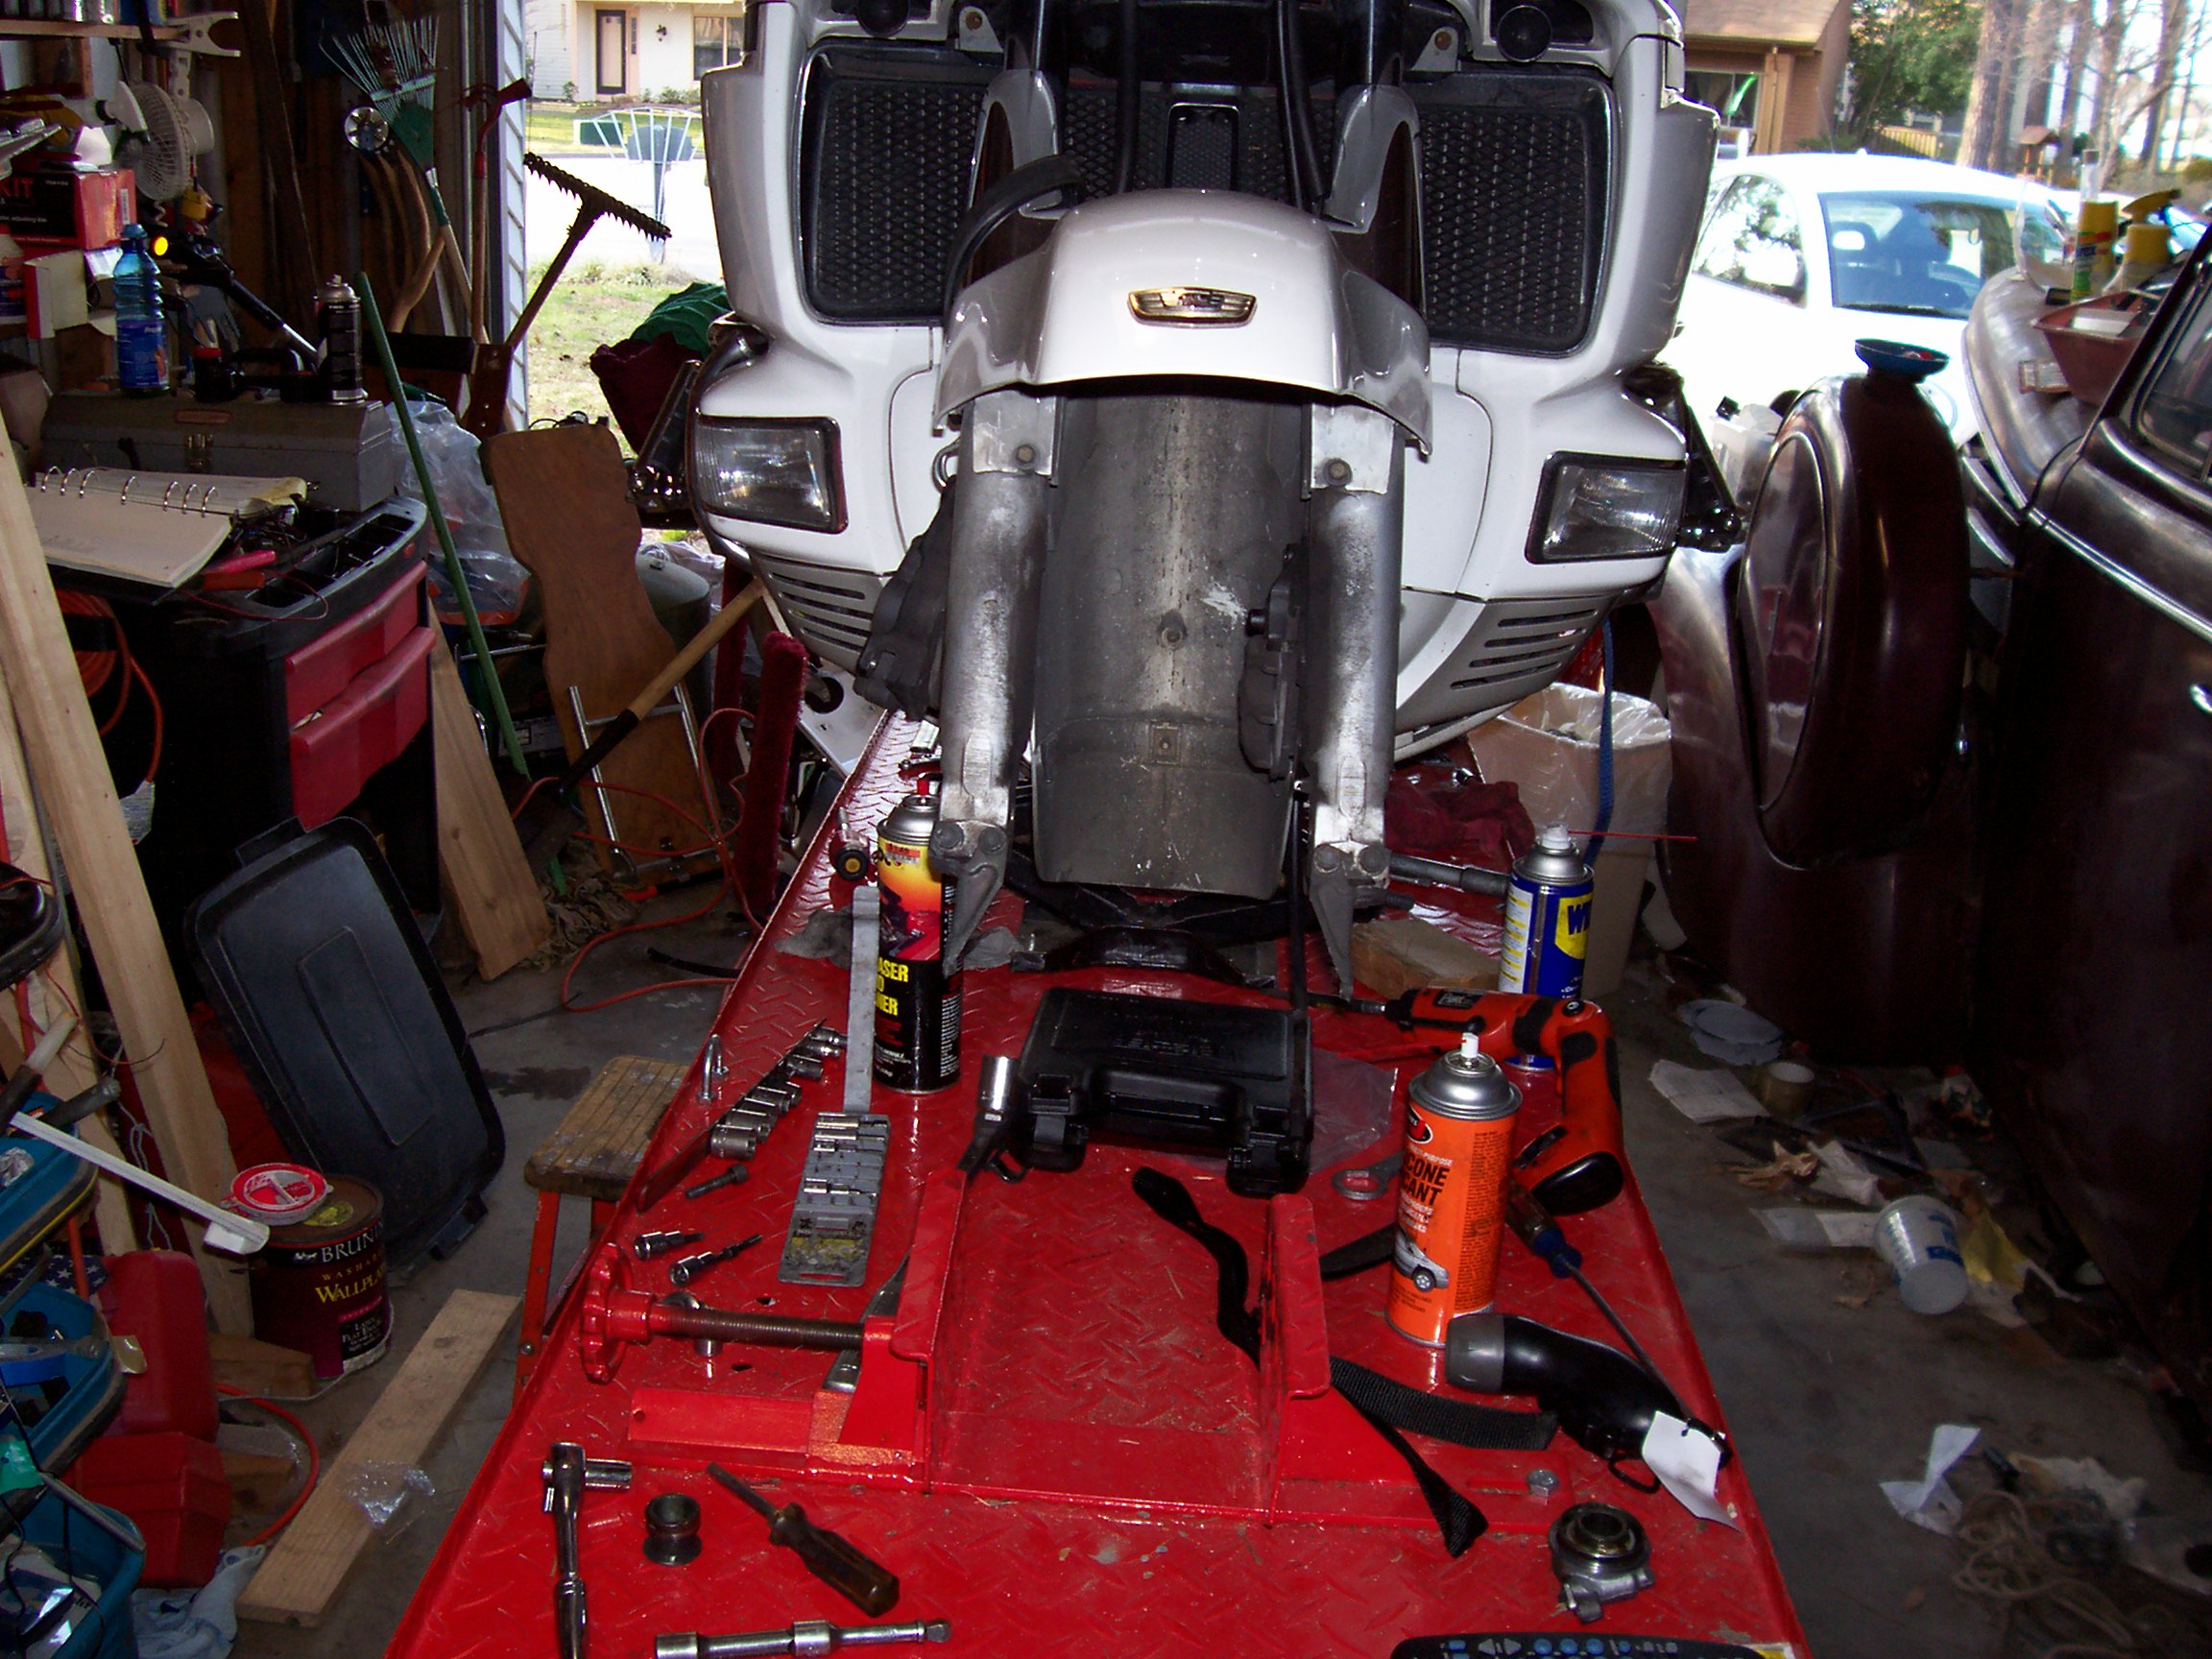
I have a low cost table style motorcycle lift. It is from Harbor Freight. The brand name is Central Hydraulics. Part number is ITEM 91764-1VGA.
The lift is rated for 1000 lbs. It handles both of my Goldwings, a 1200I and a 1500 SE. However, while it handles the weight, it isn't designed for a bike this big, so I can't use all the features. (See the below section on the modification I made compensating for this.)
I took all the pictures using my digital camera at the 4 mega-pixel setting. The page includes thumbnail versions of the pictures. But I chose to make the thumnails pretty large themselves. The thumbnails are 400x300 at 75dpi resolution. In many cases this picture itself will be big enough for your use.
But, you can click on any picture and the full size version will load. If you have a DSL or cable connection this should not be a big deal, but if you have dial-up, go get a cup of coffee.
|
|
This is the lift.
The lift isn't wide enough or heavy enough for me to comfortably ride the bike up. Normally I push the bike up, starting back a few feet and getting a running start. Occasionally I'll start the engine and let the motor do the work, but it is a scary time.
WARNING: REMEMBER TO ALWAYS PUT THE SIDESTAND UP. THE SIDE STAND WILL (MAY) HIT THE RAMP AND PUSH THE BIKE OVER TO THE RIGHT. IT WILL GO ALL THE WAY OVER. THE ENGINE GUARDS WILL NOT STOP THE BIKE UNTIL THE BIKE IS ALL THE WAY OVER ON THE GARAGE FLOOR. IT WILL BE PAST THE 45 DEGREE ANGLE. IT WILL BE ALL THE WAY OVER.

|

|
Because the lift isn't very wide, you are going to need something to stand on when you try to put the bike on the centerstand. I use an auto ramp. I position it so that I can walk up it as I push the bike up into position. Then I am standing even with the bike so that I can balance it and put it on the center stand.
On my 1200 I could use the side stand while I got myself situated. But on the 1500 the sidestand is too wide and is off the outside edge of the lift. So be prepared in advance. When you roll it up onto the lift, you have to be ready to go straight to the centerstand.
WARNING: DO NOT ATTEMPT TO LIFT THE BIKE WHILE ON THE SIDESTAND. THE LIFT MUST BE BALANCED. YOU MUST BE ON THE CENTERSTAND.
|

|
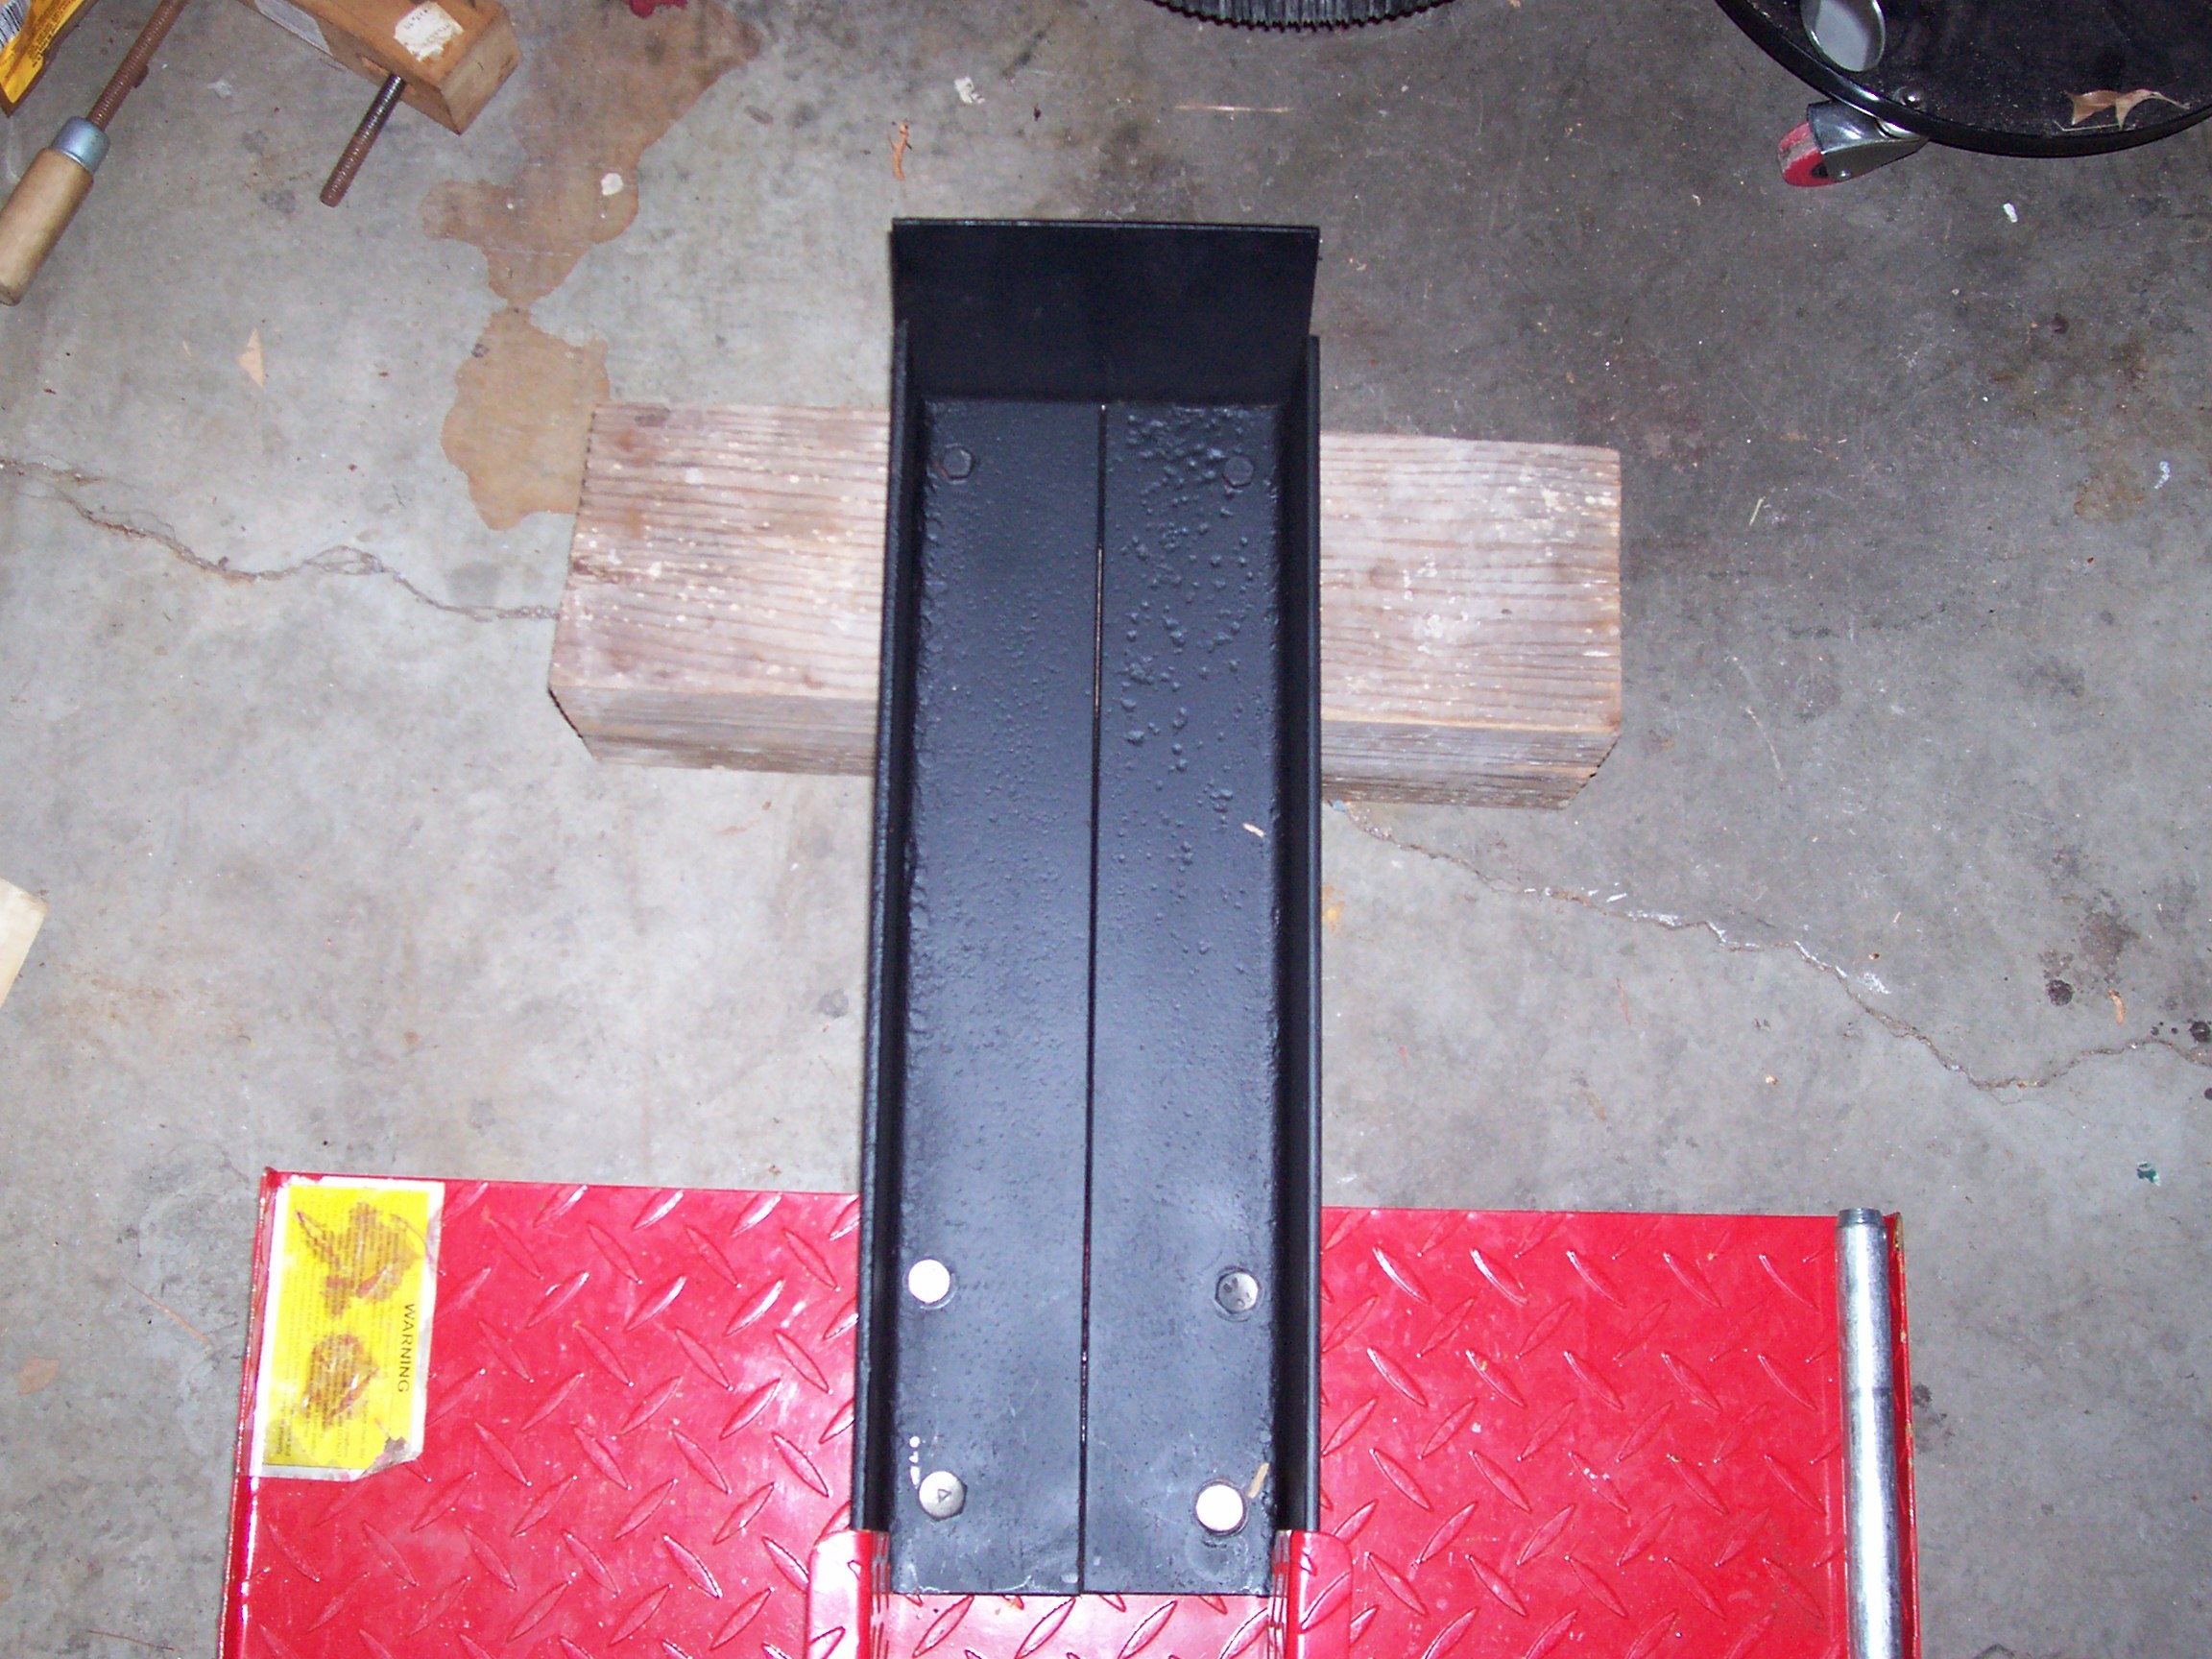
At the front there is a small vice to hold the front wheel, and a tire stop to stop the bike from rolling too far forward.
I haven't figured out the use for this vice yet. It is too small to do anything except prevent the handle bars from swinging left/right. And in any job I have needed to do I have always needed to move the handle bars. So the vice is in the way. So most of the time I remove the vice.
But that leaves another problem. The wheel stop isn't very wide and I'd hate to miss when I roll the bike up. The vice does make sure you are centered.
In the near future I plan to modify the wheel stop to extend it further out. I plan to use some angle iron, so hopefully that will solve the problem of keeping the bike centered.
|
|
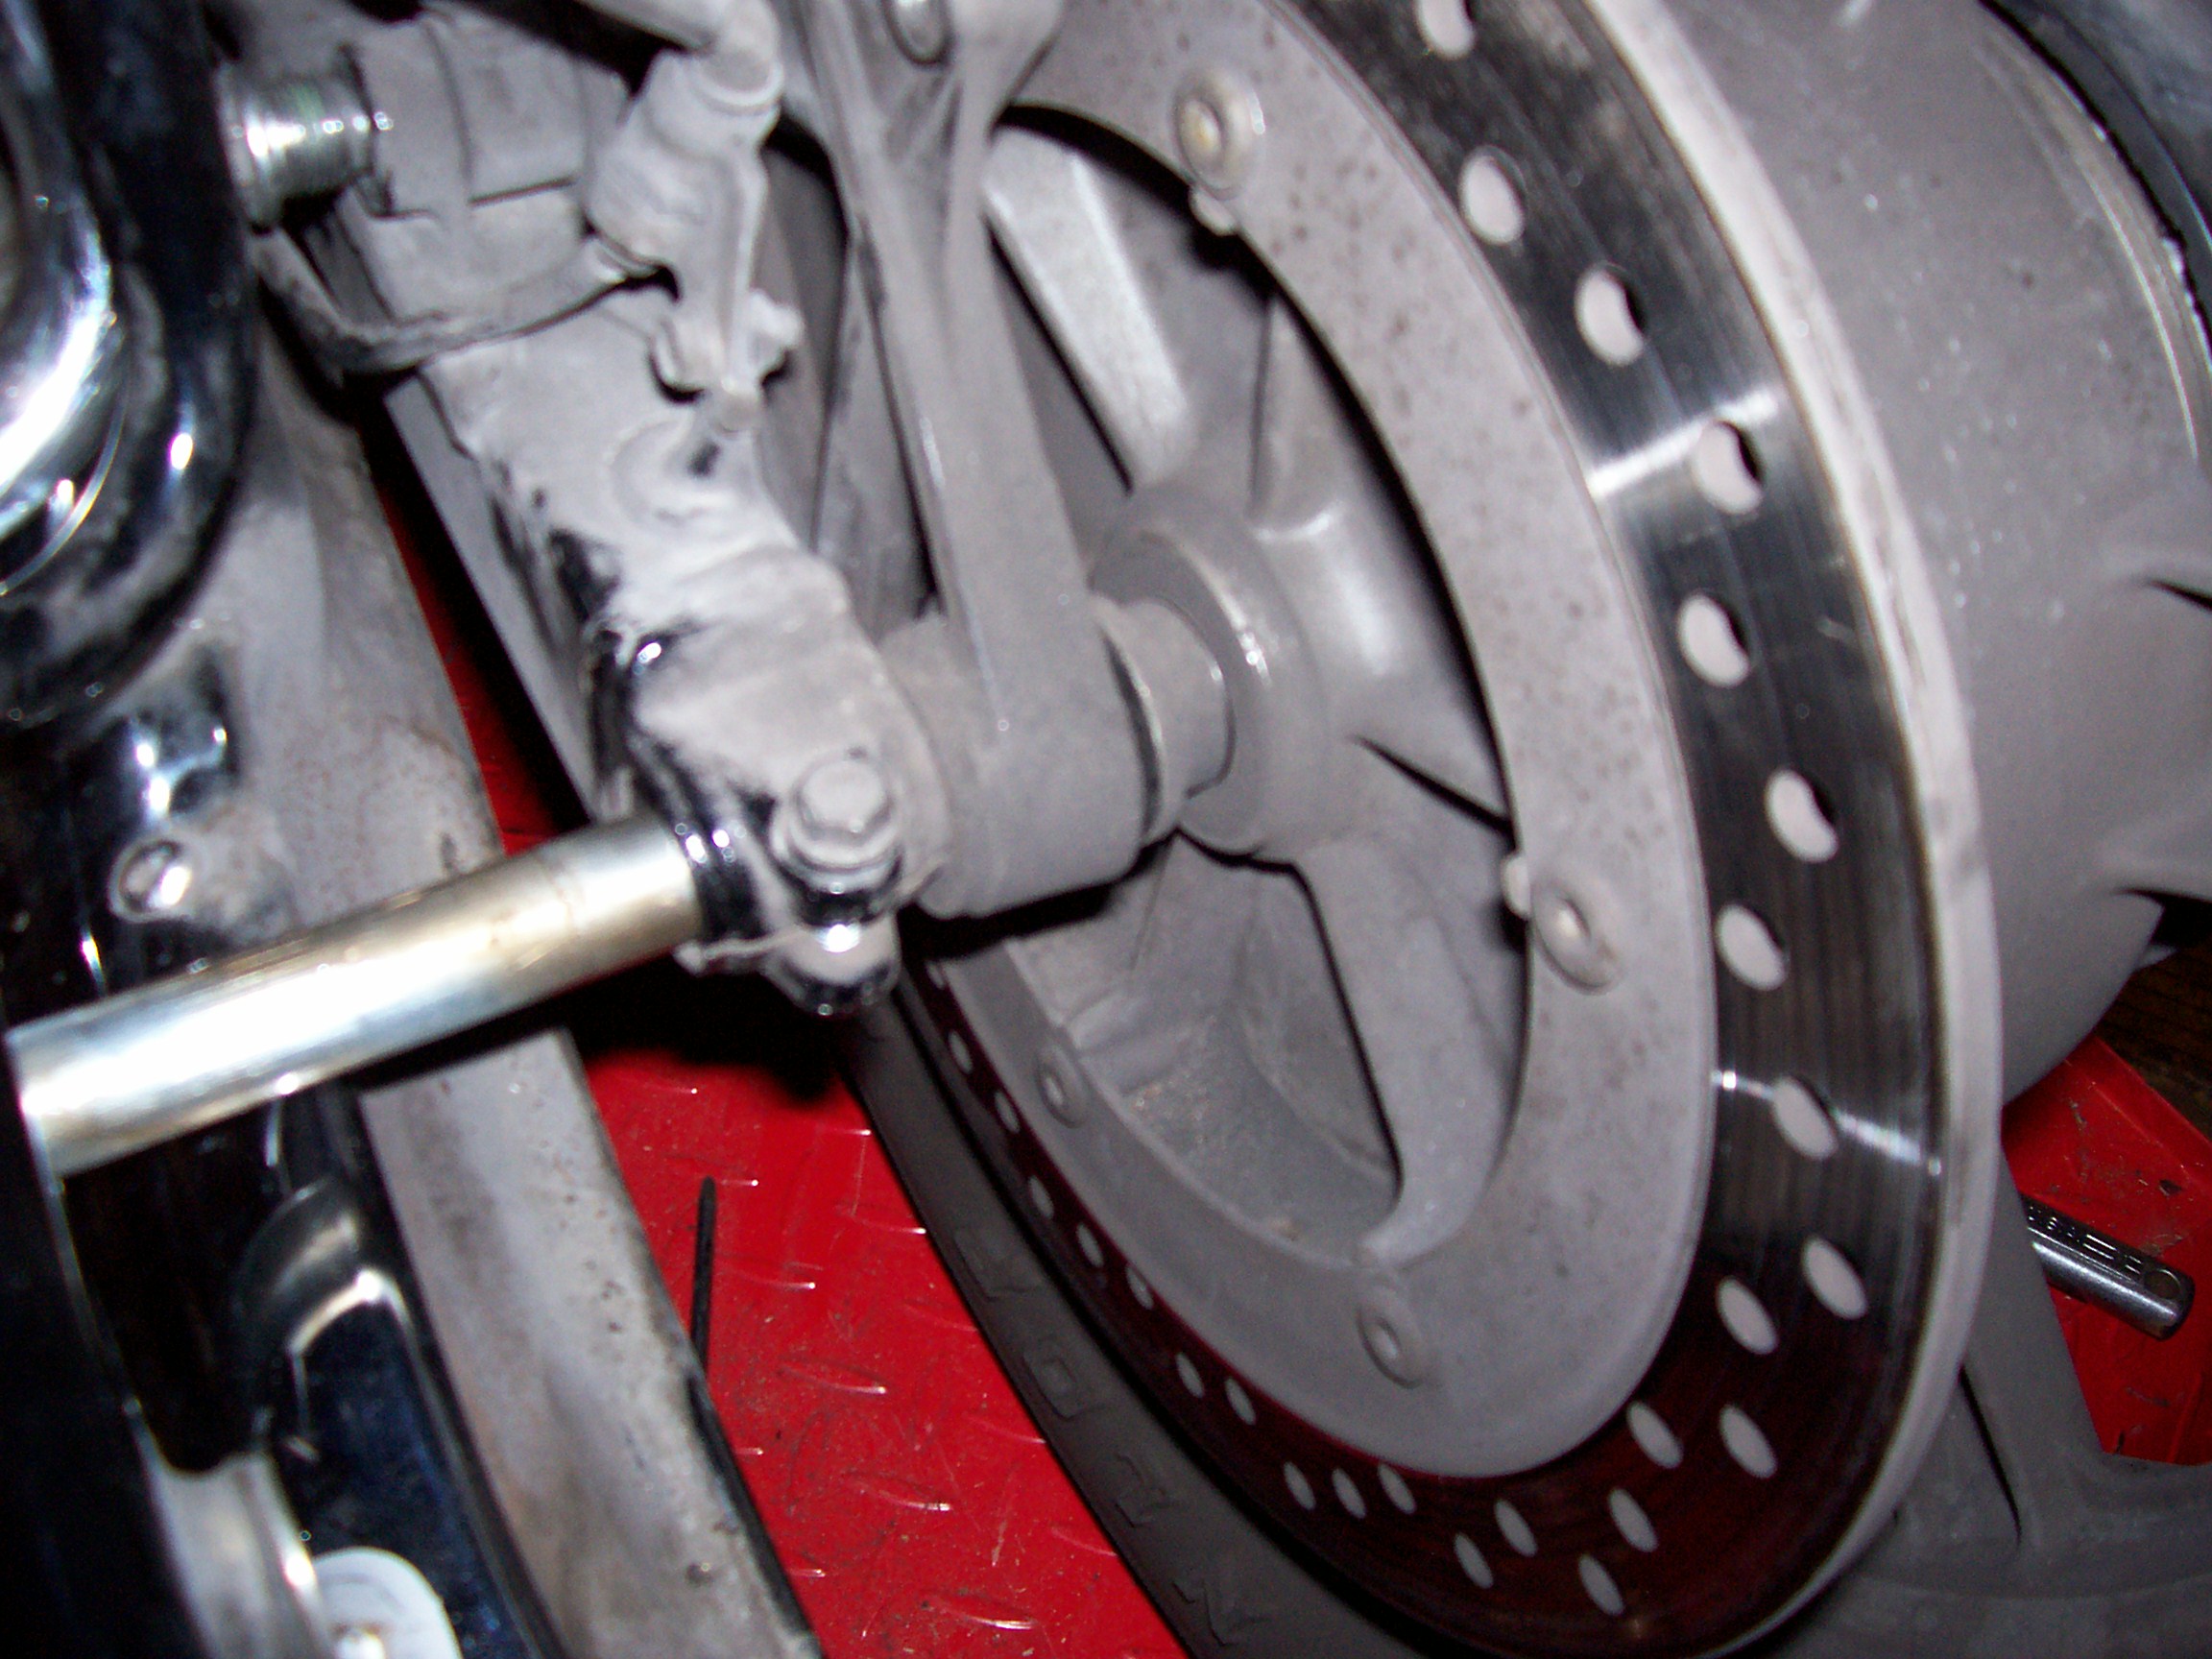
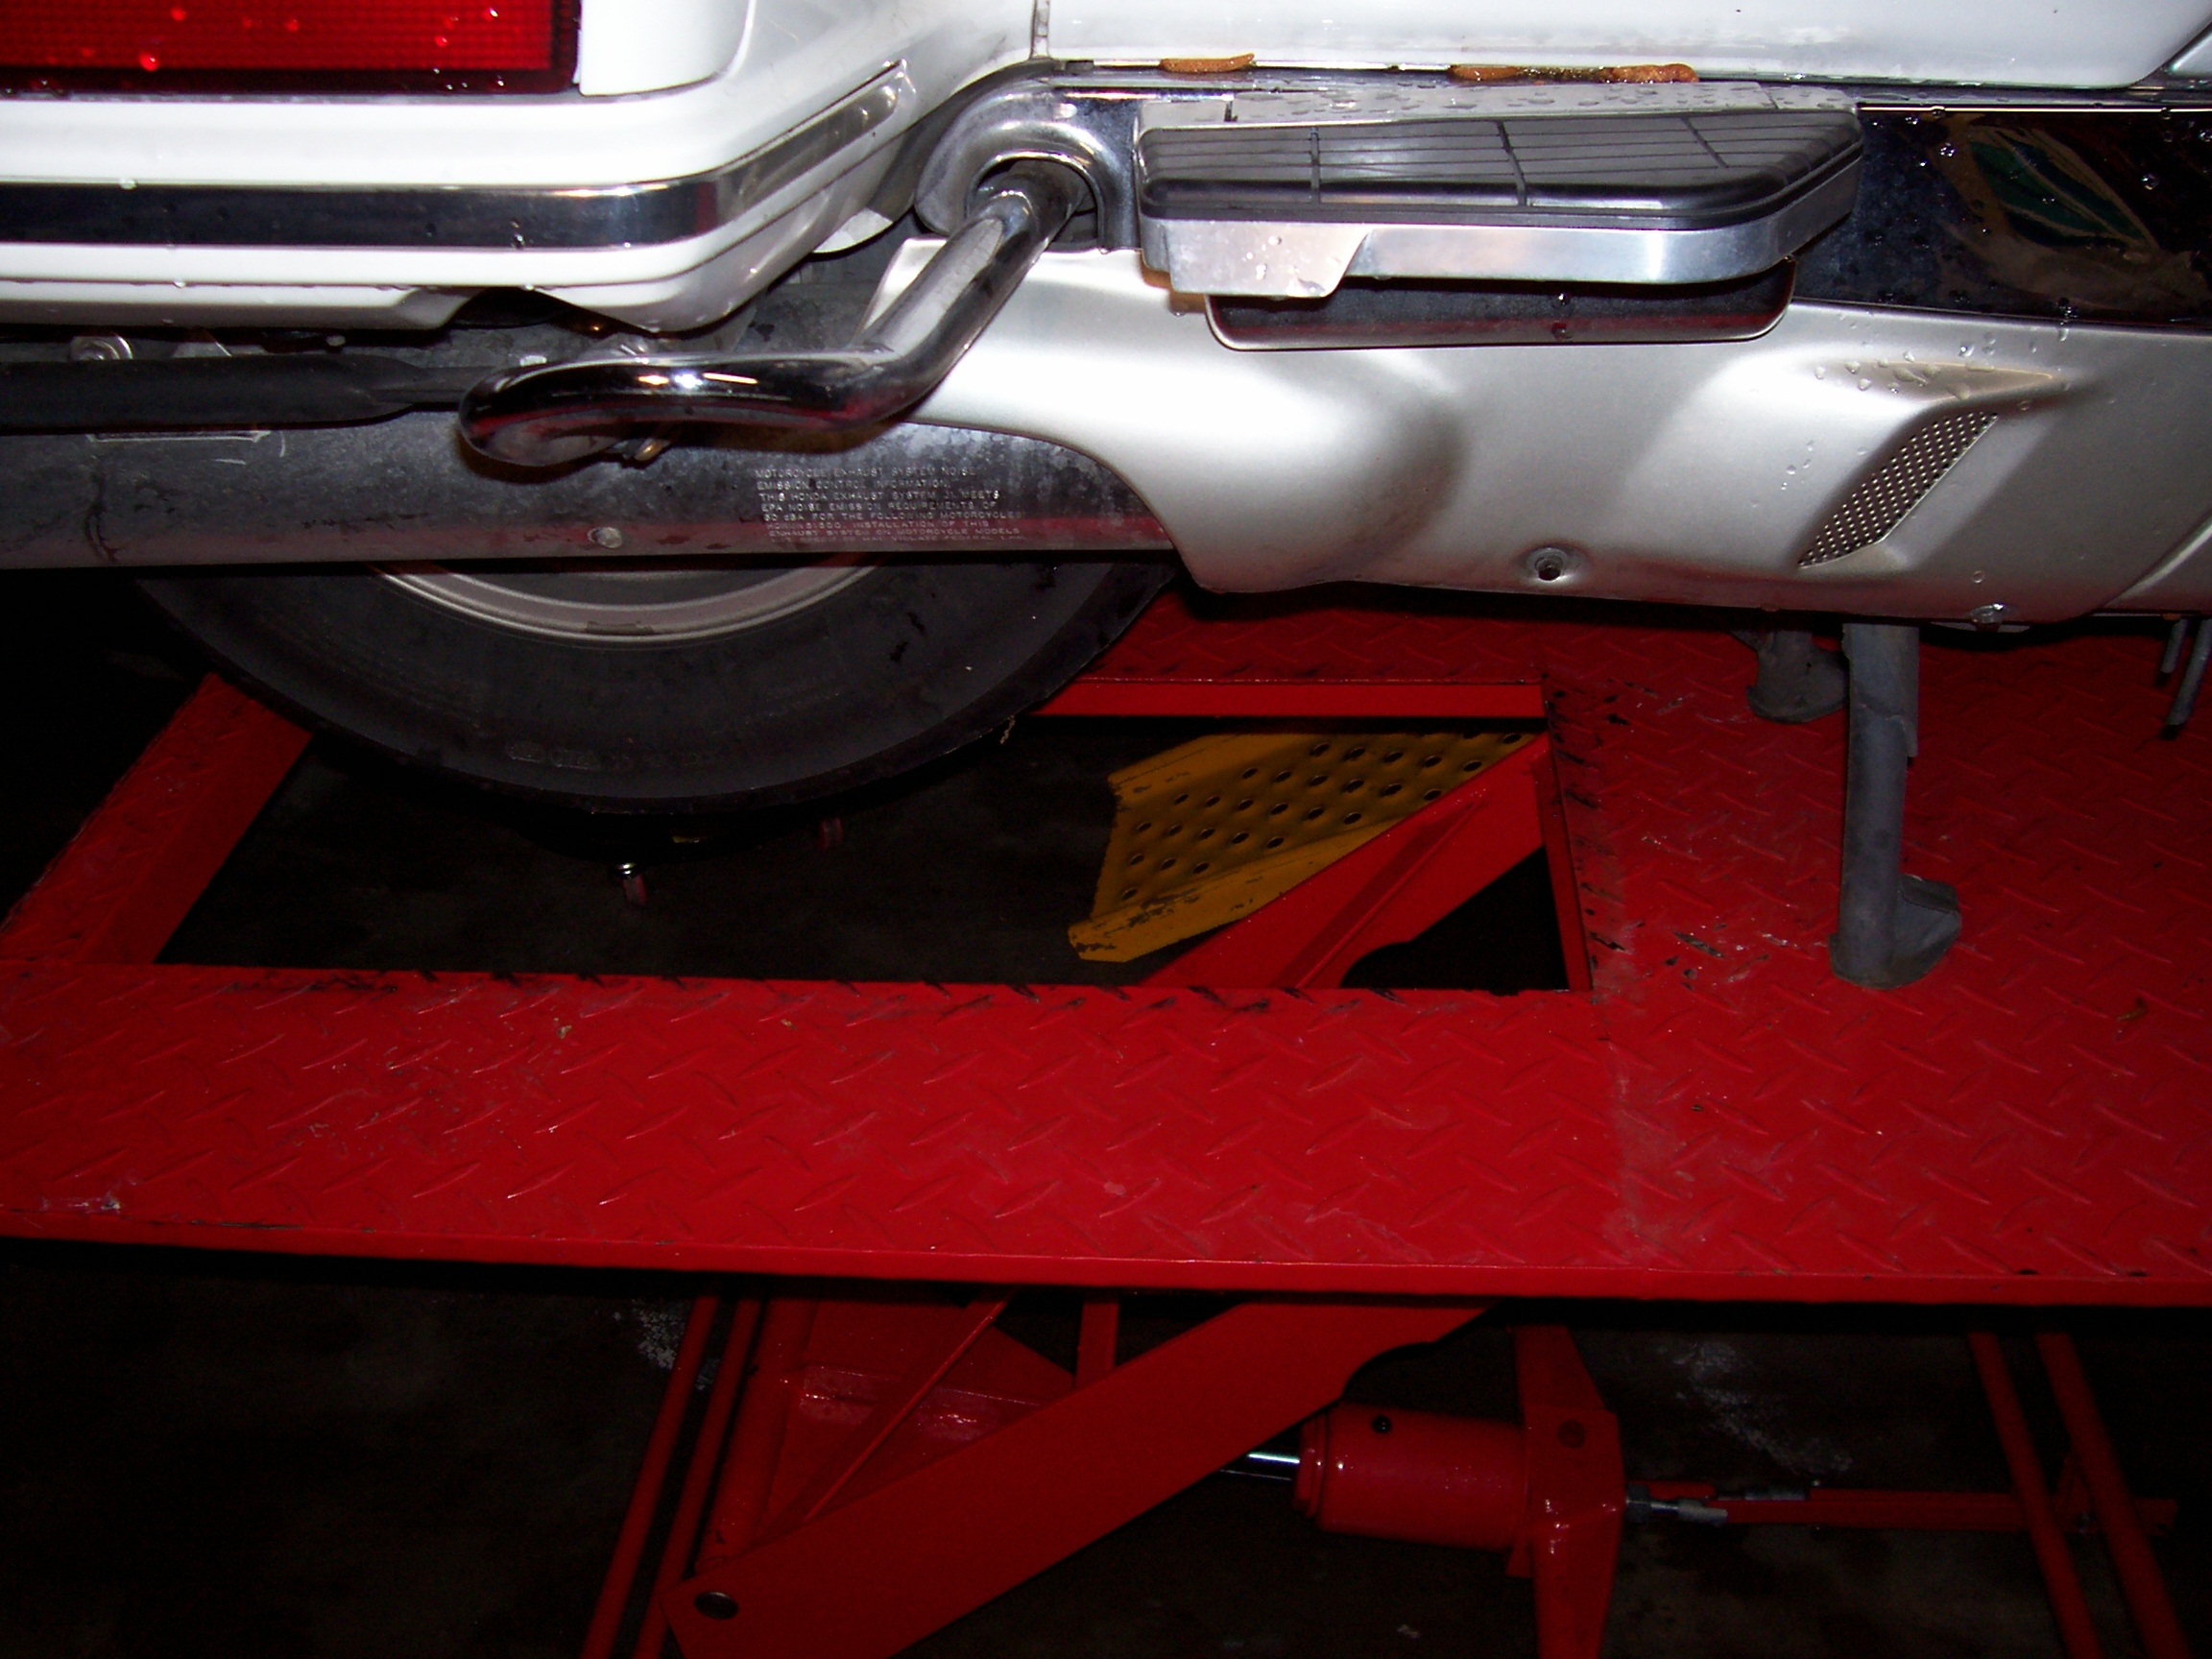
At the rear there is a removable plate, designed to provide access for removal of the rear wheel. As you can see, the bike lines up too far to the rear.

|
|
Also the center stand of the bike is on the plate, preventing it's removal.
|

|
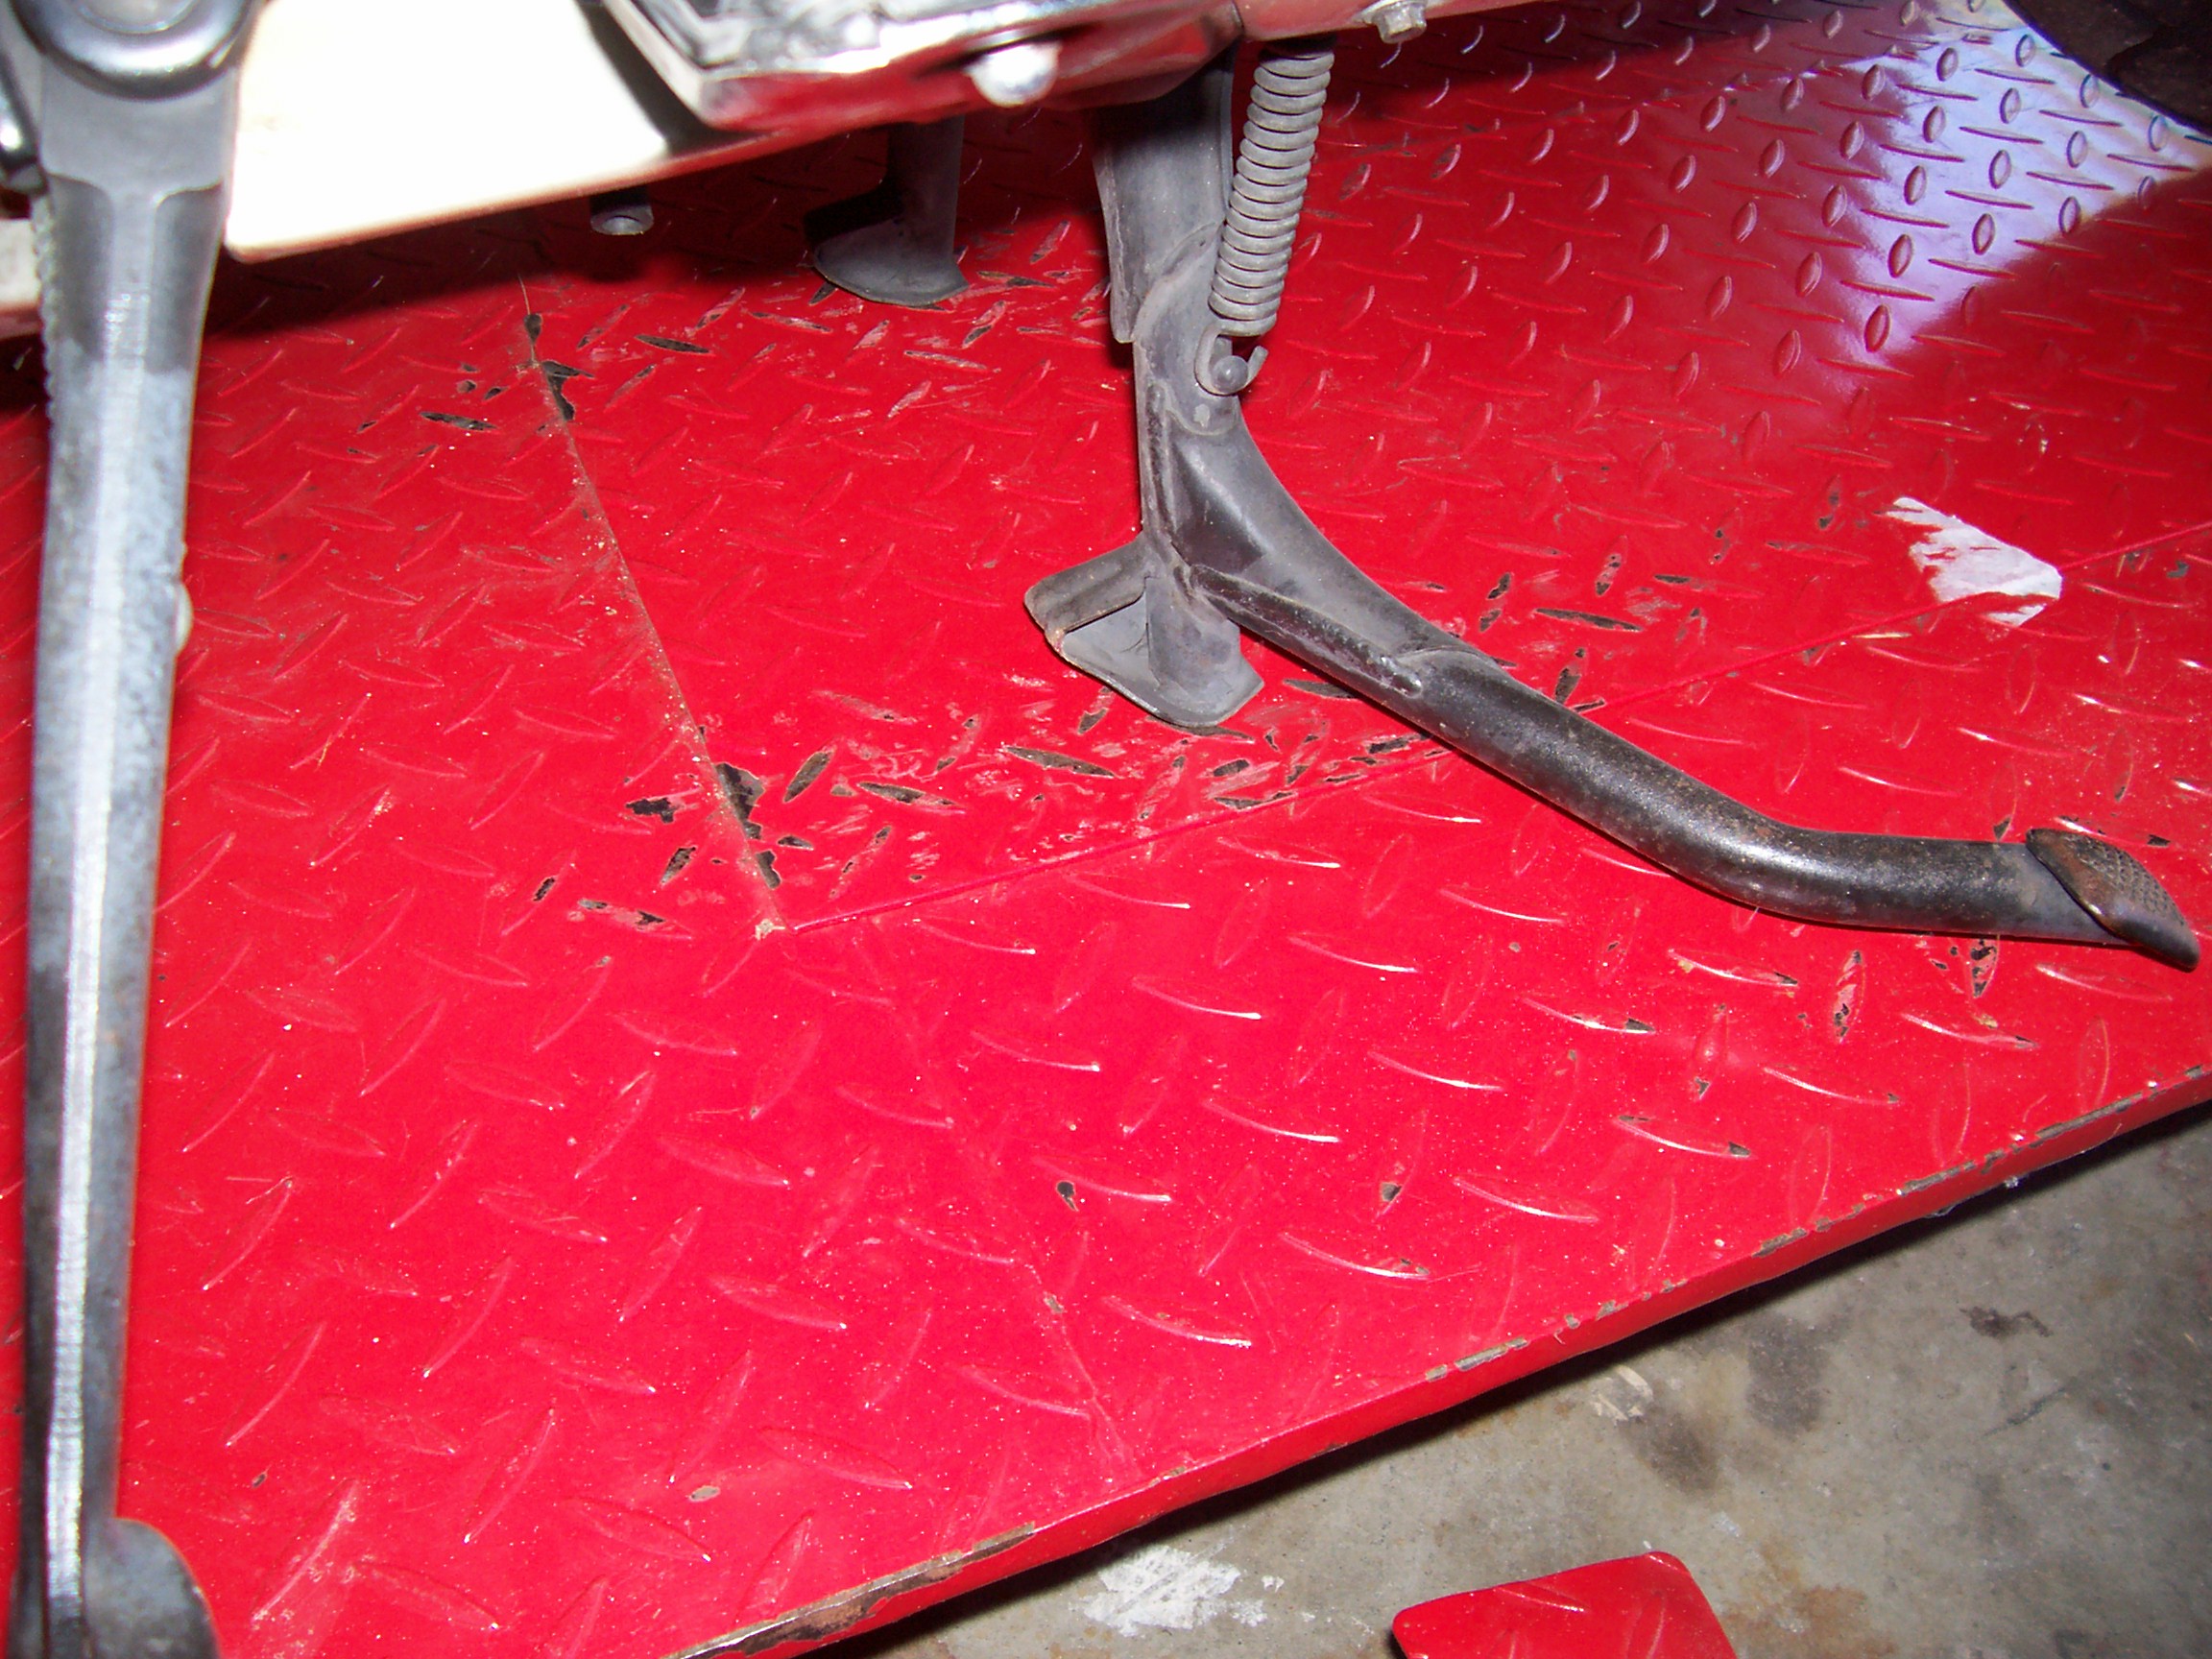
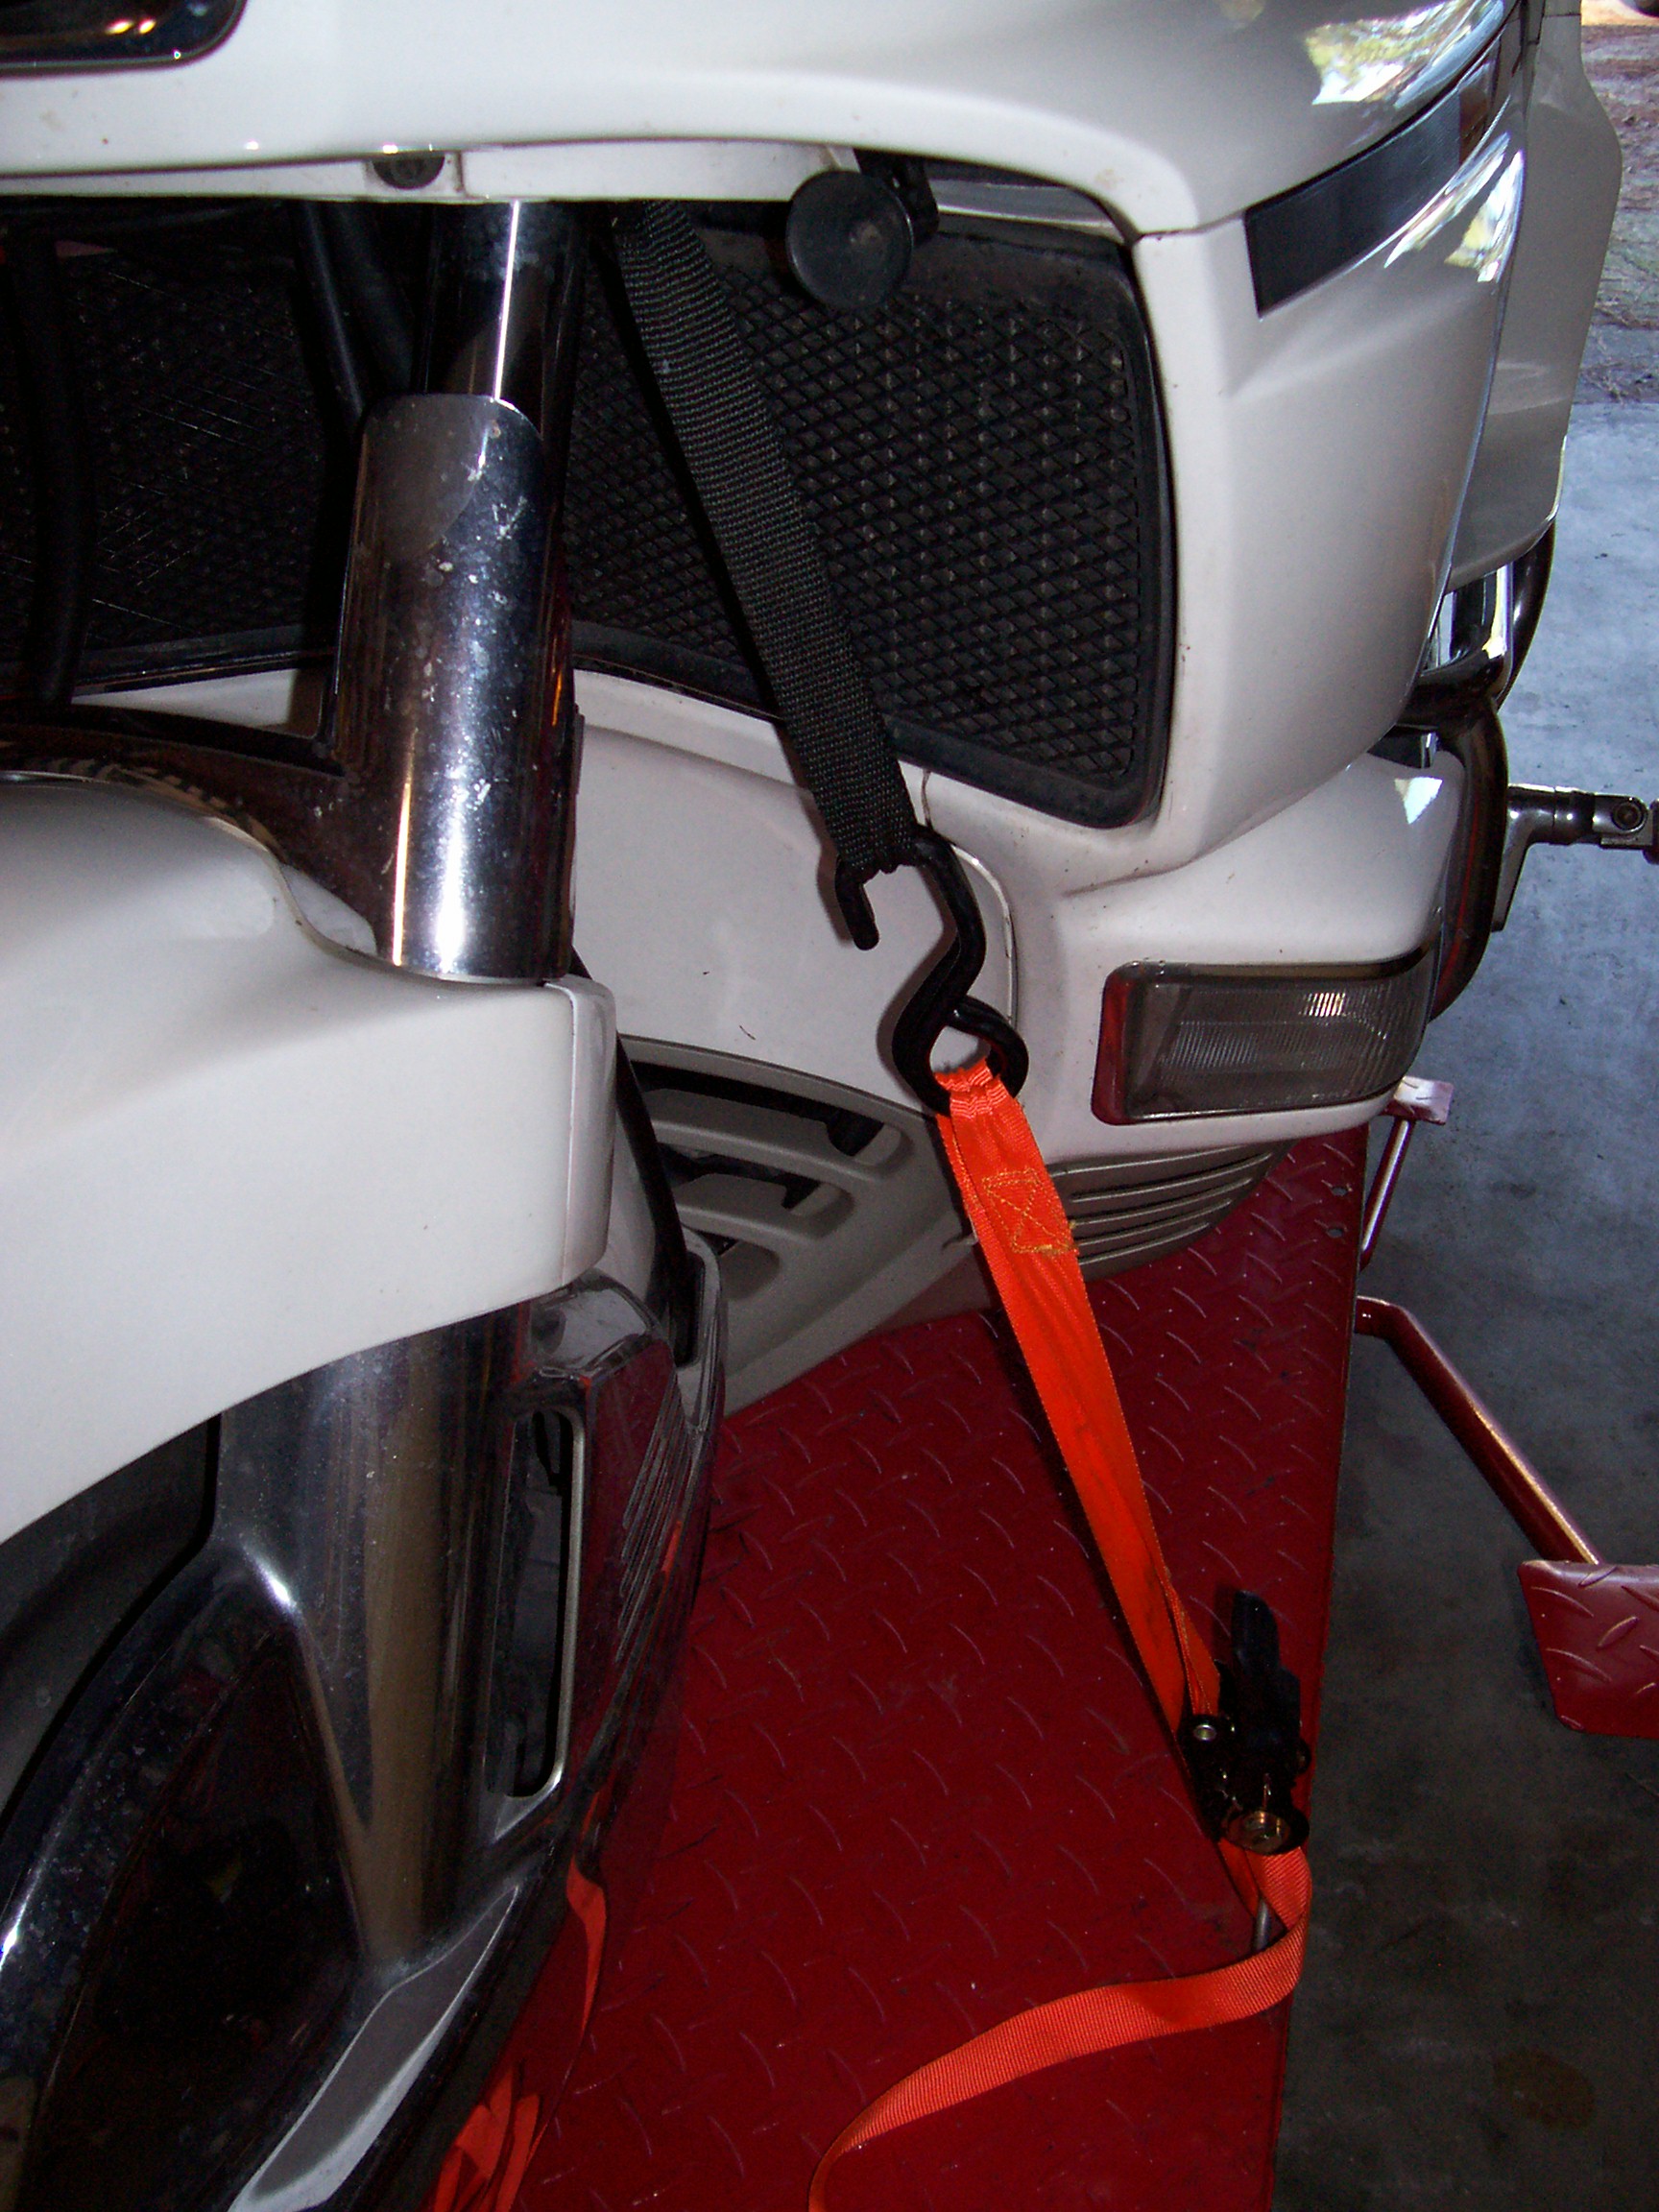
There is a place to tie the bike for safety. Also there is a safety bar to hold the lift up to take the pressure of the jack mechanism. It's a lot of weight. You can see the pressure on the bar when you let it down.
|
|
|
|
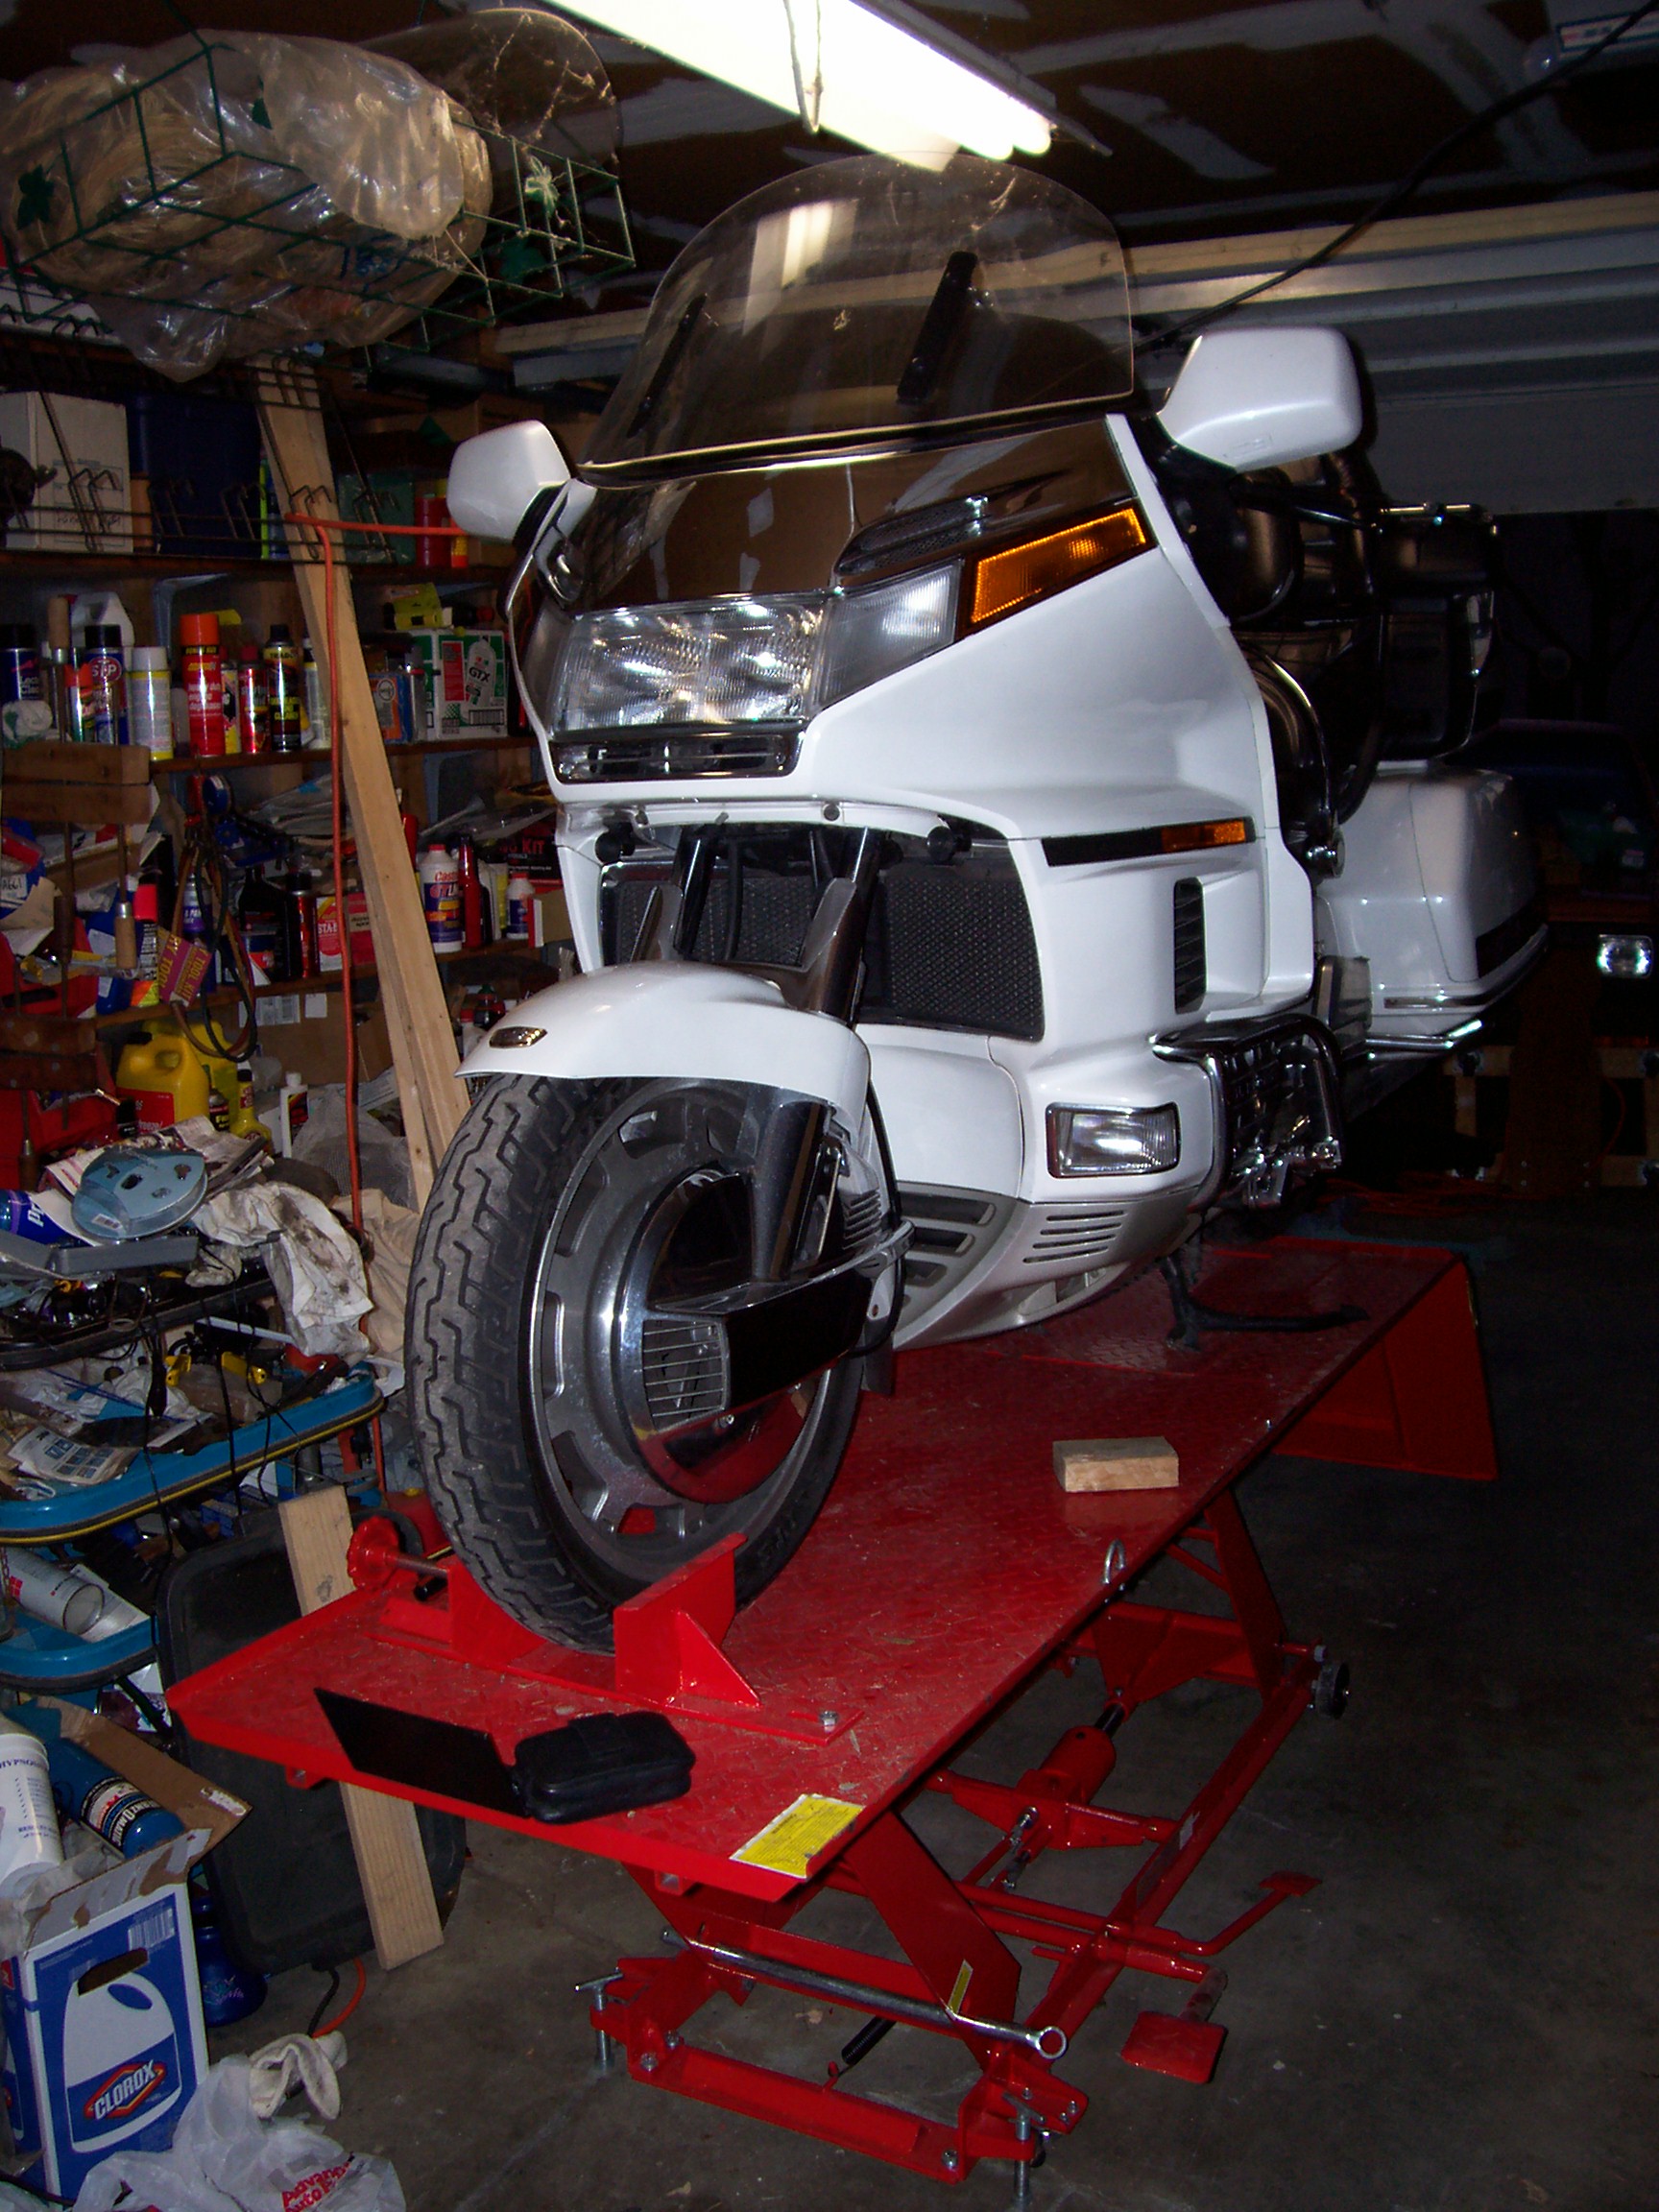
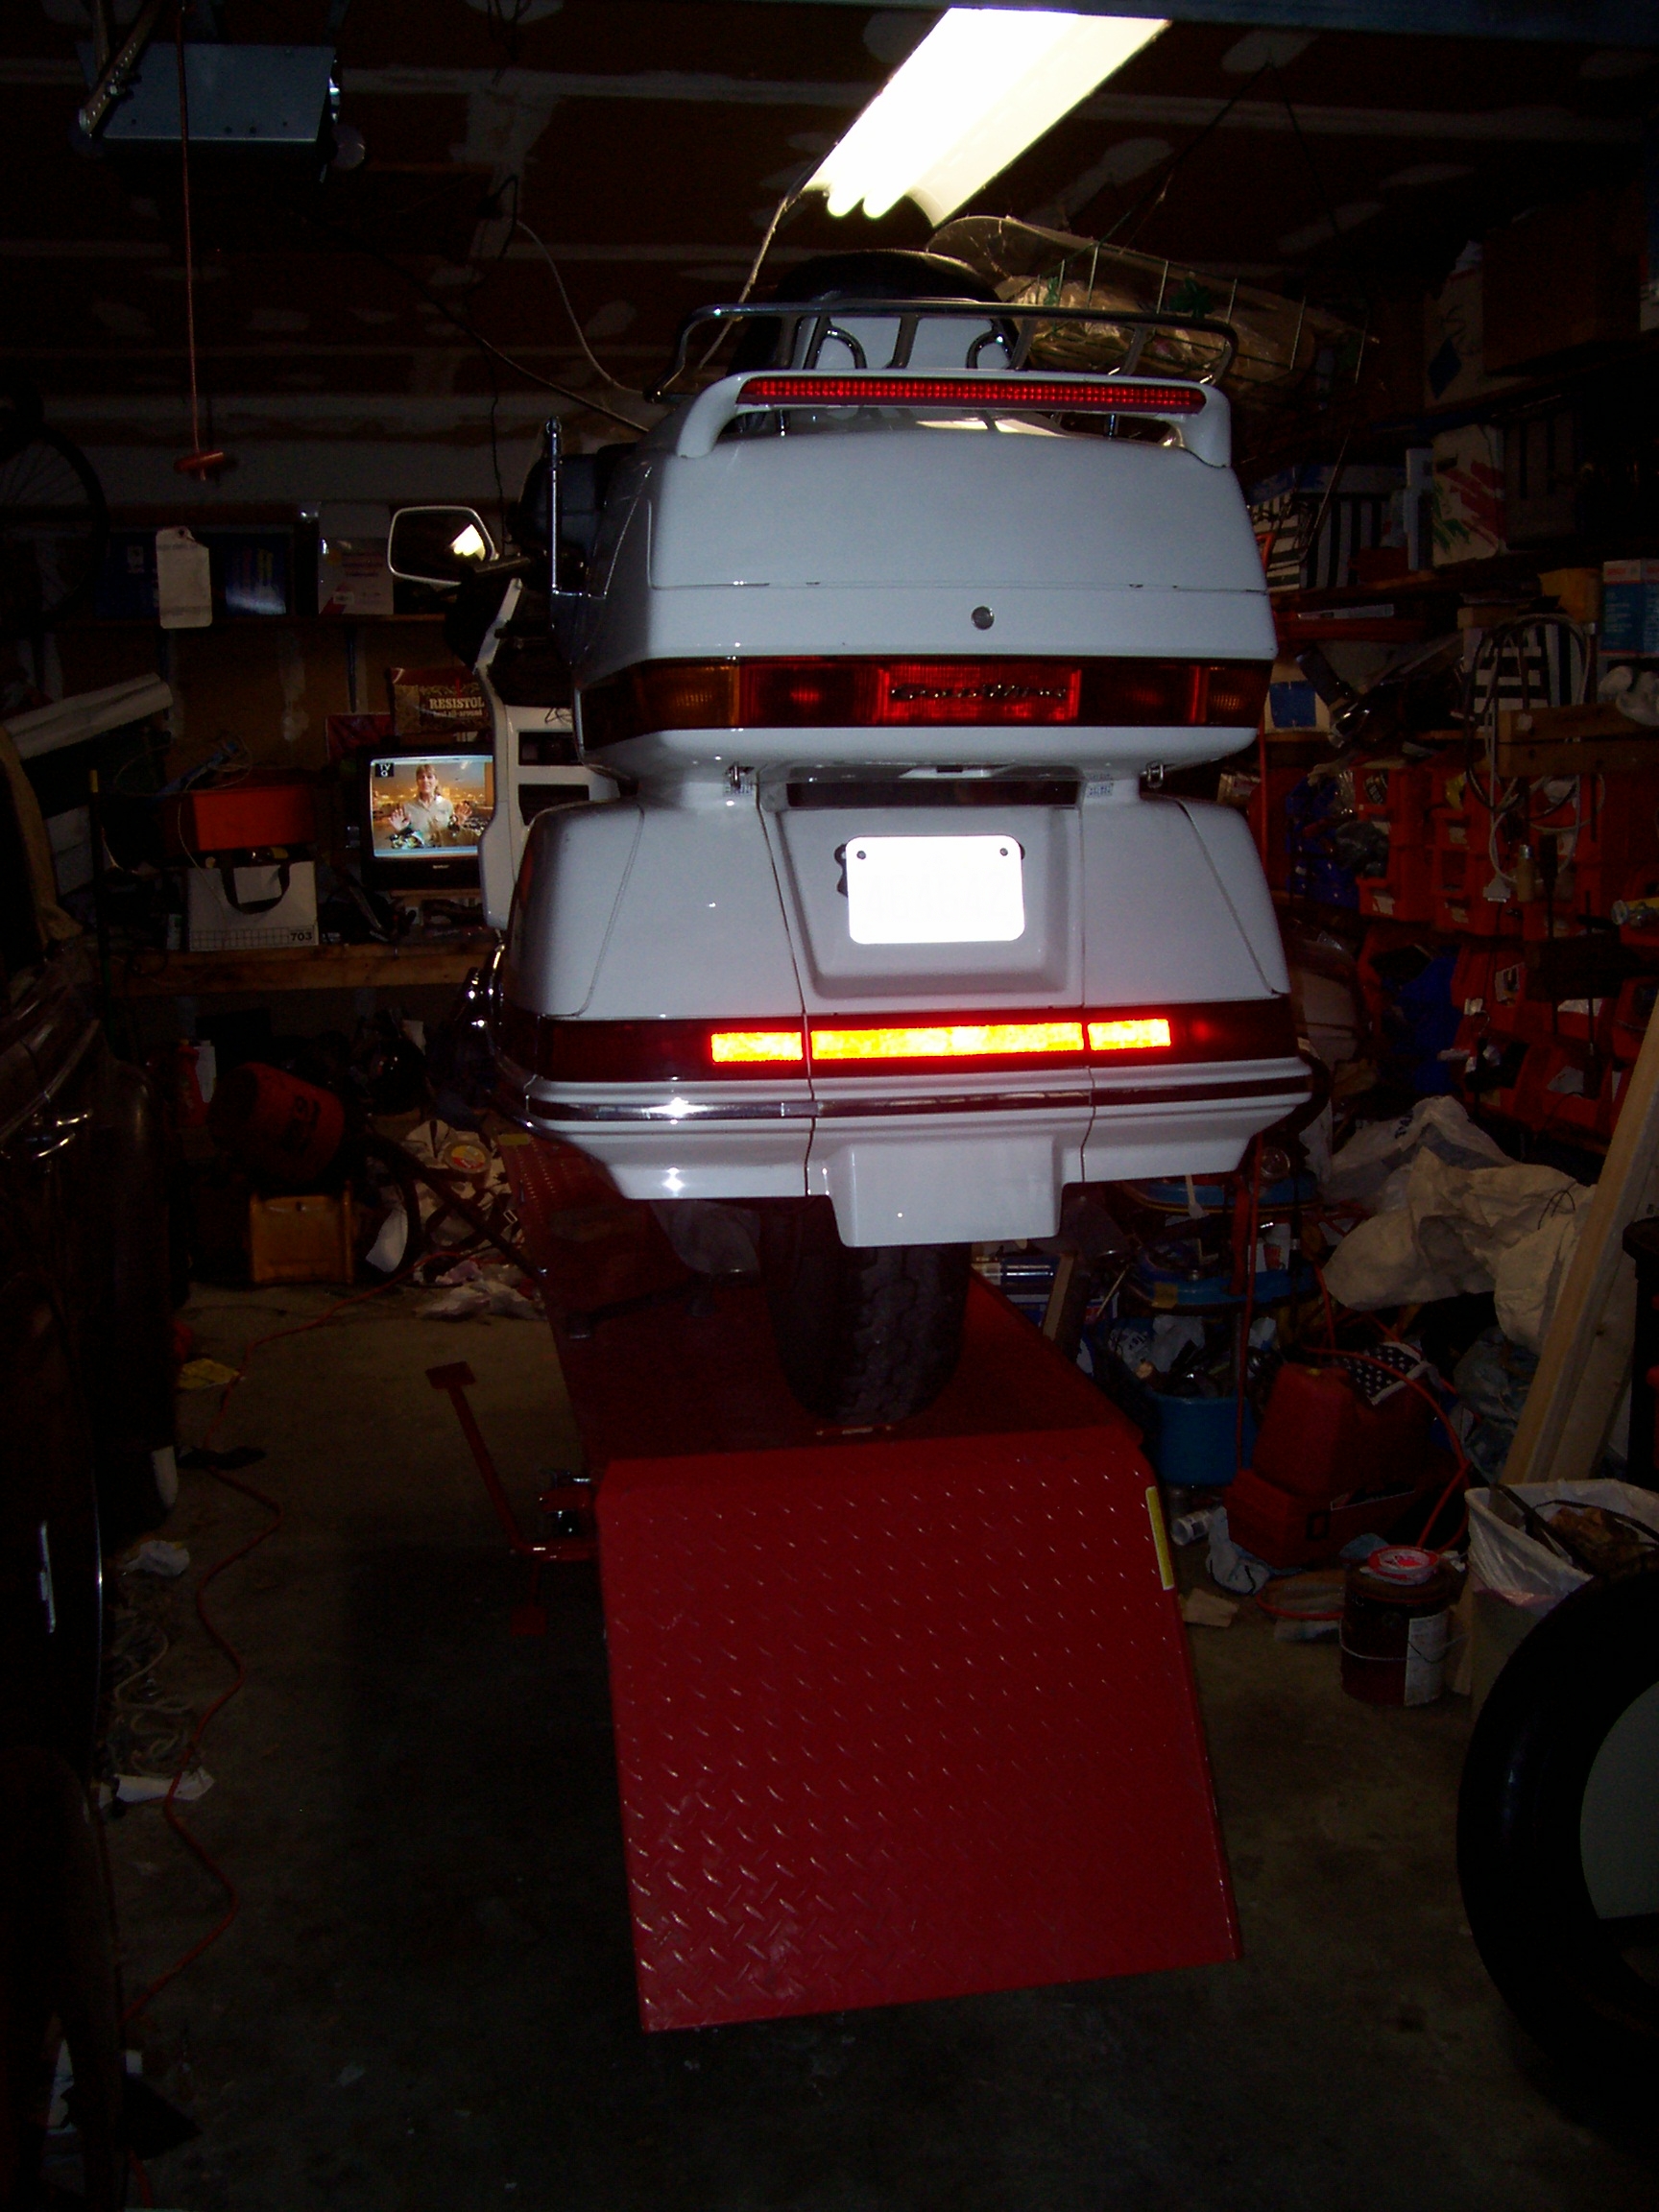
Just so that there isn't any doubt, the lift can handle the bike.
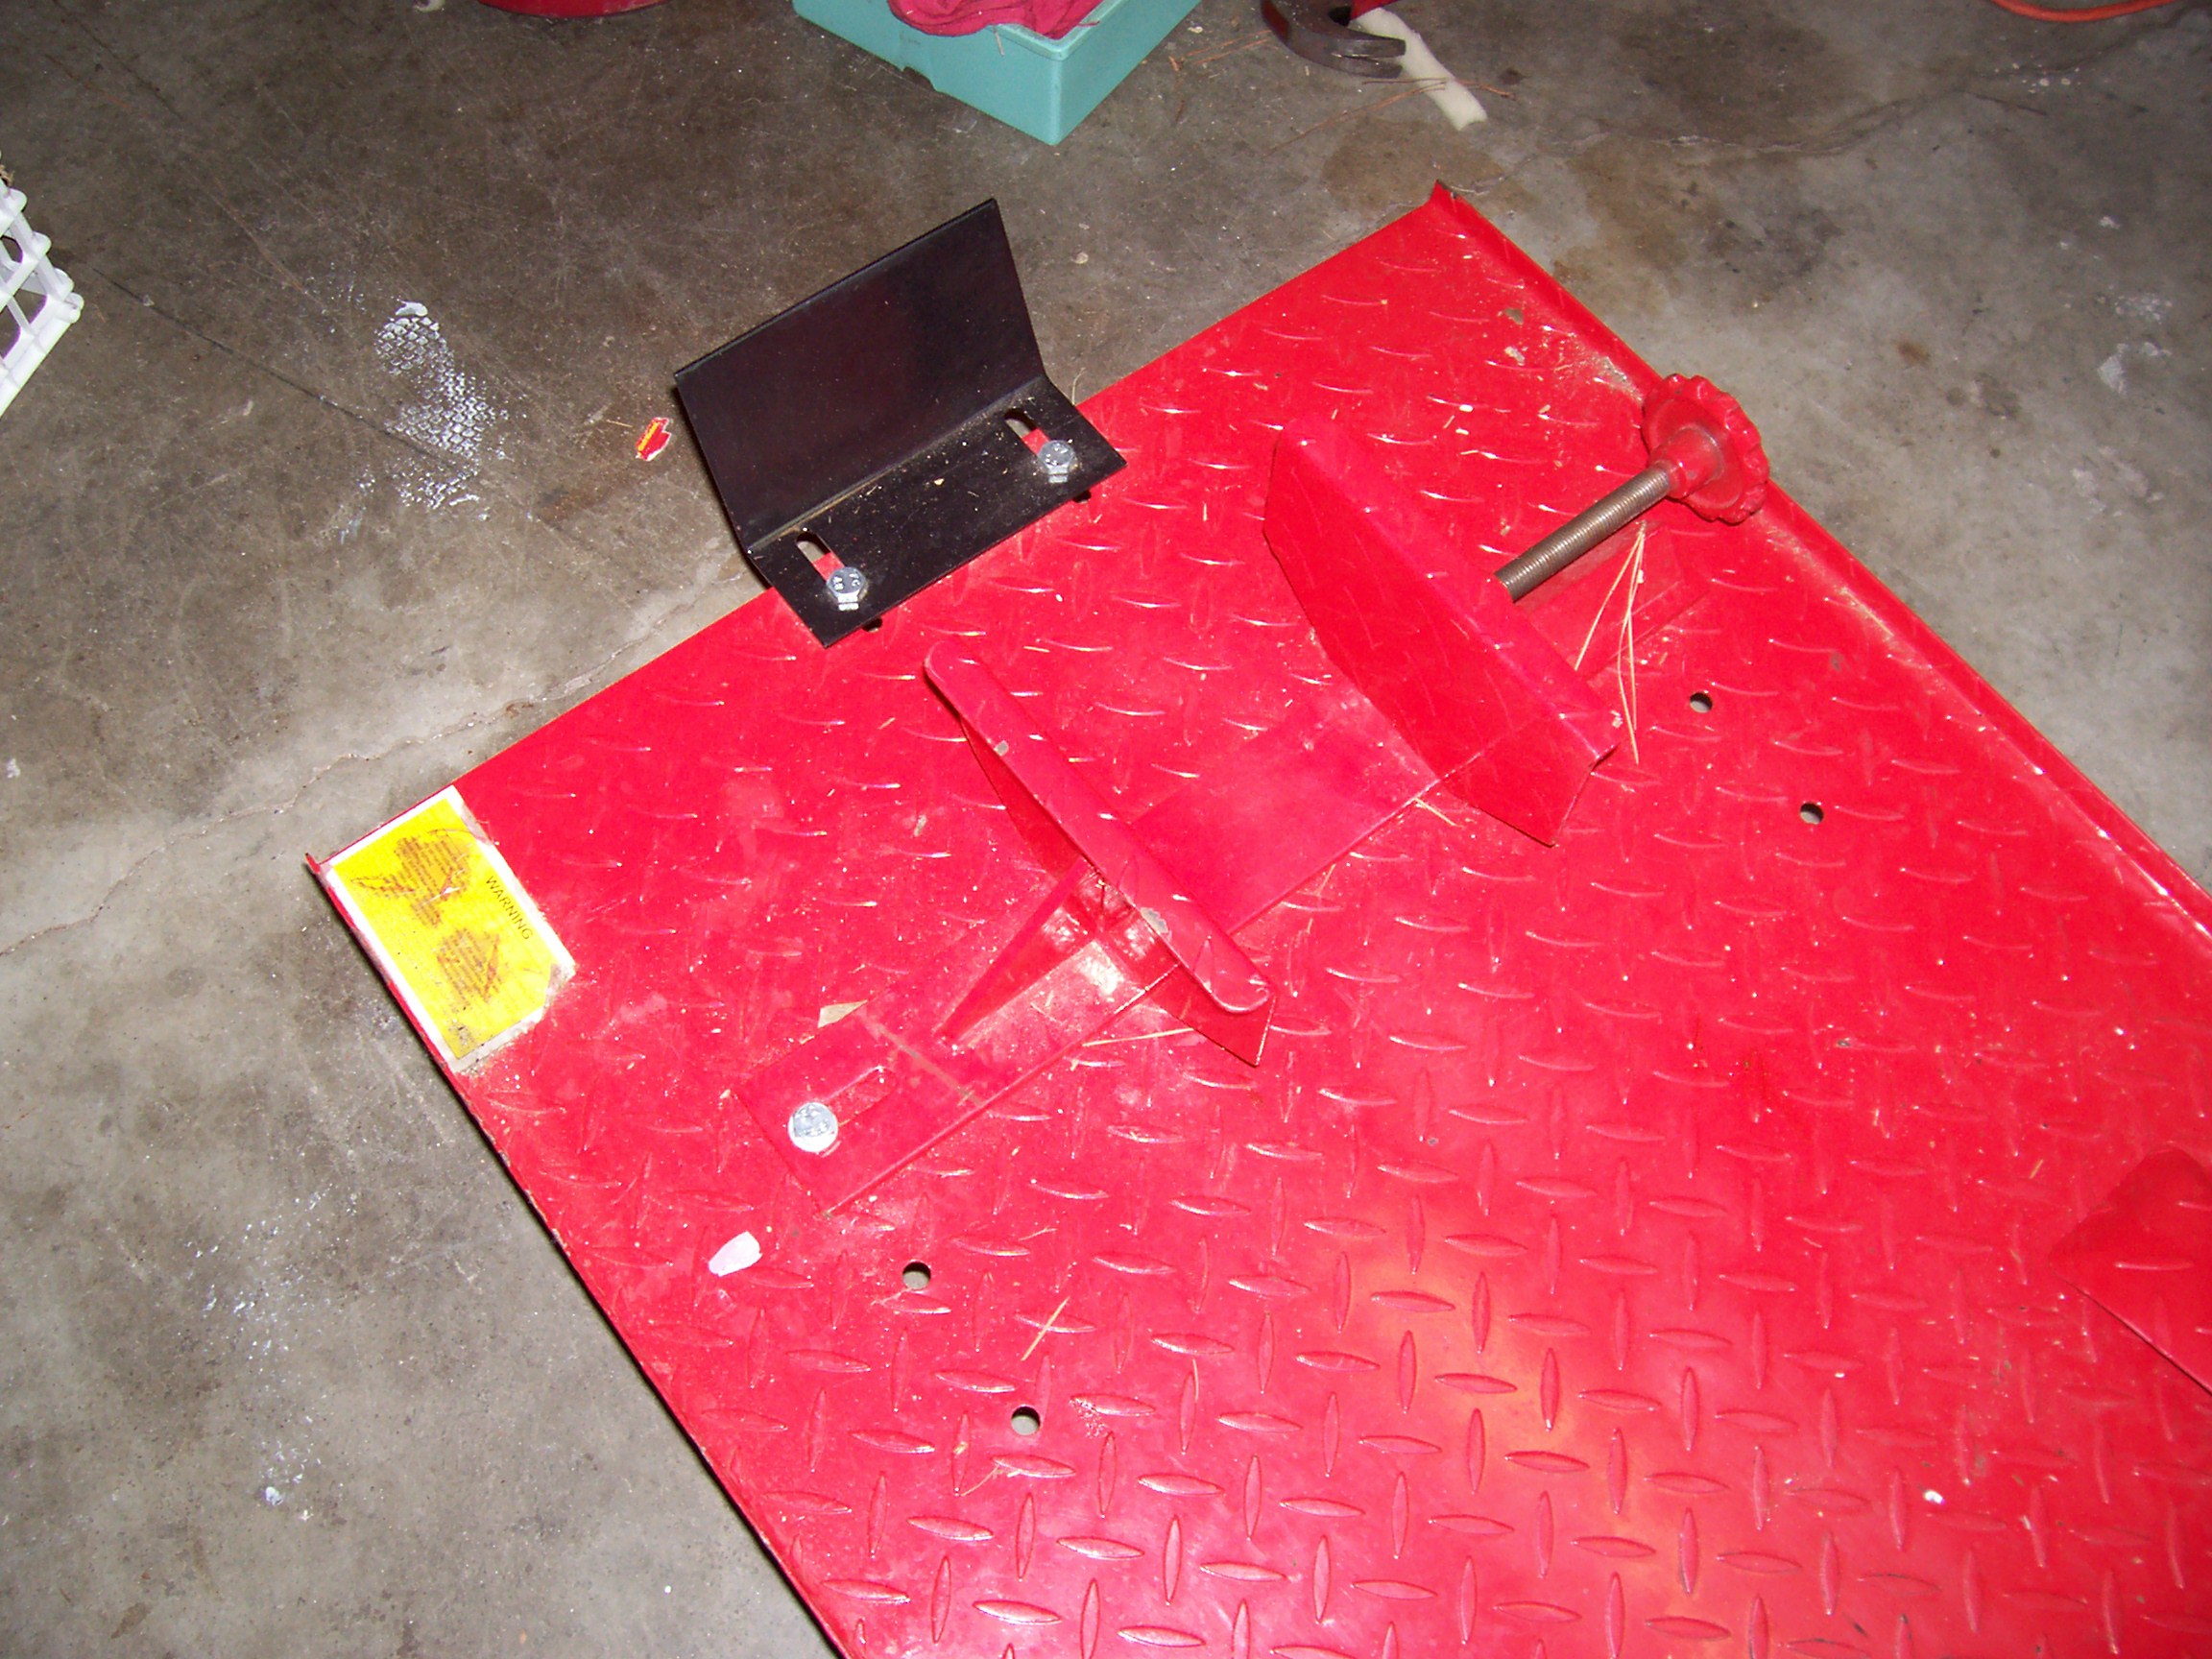
As mentioned above, the lift isn't long enough to get full use with a Goldwing. I had an idea to extend the lift to the front with a plate of some kind.
Then I saw another similar lift using a pair of 2 foot long angle irons set about 6 inches apart and some plywood for decking.
So with some changes to utilize materials that were on hand, I modified my lift. I got help from a friend that has some heavier tools than I have, and he had the spare parts lying around.
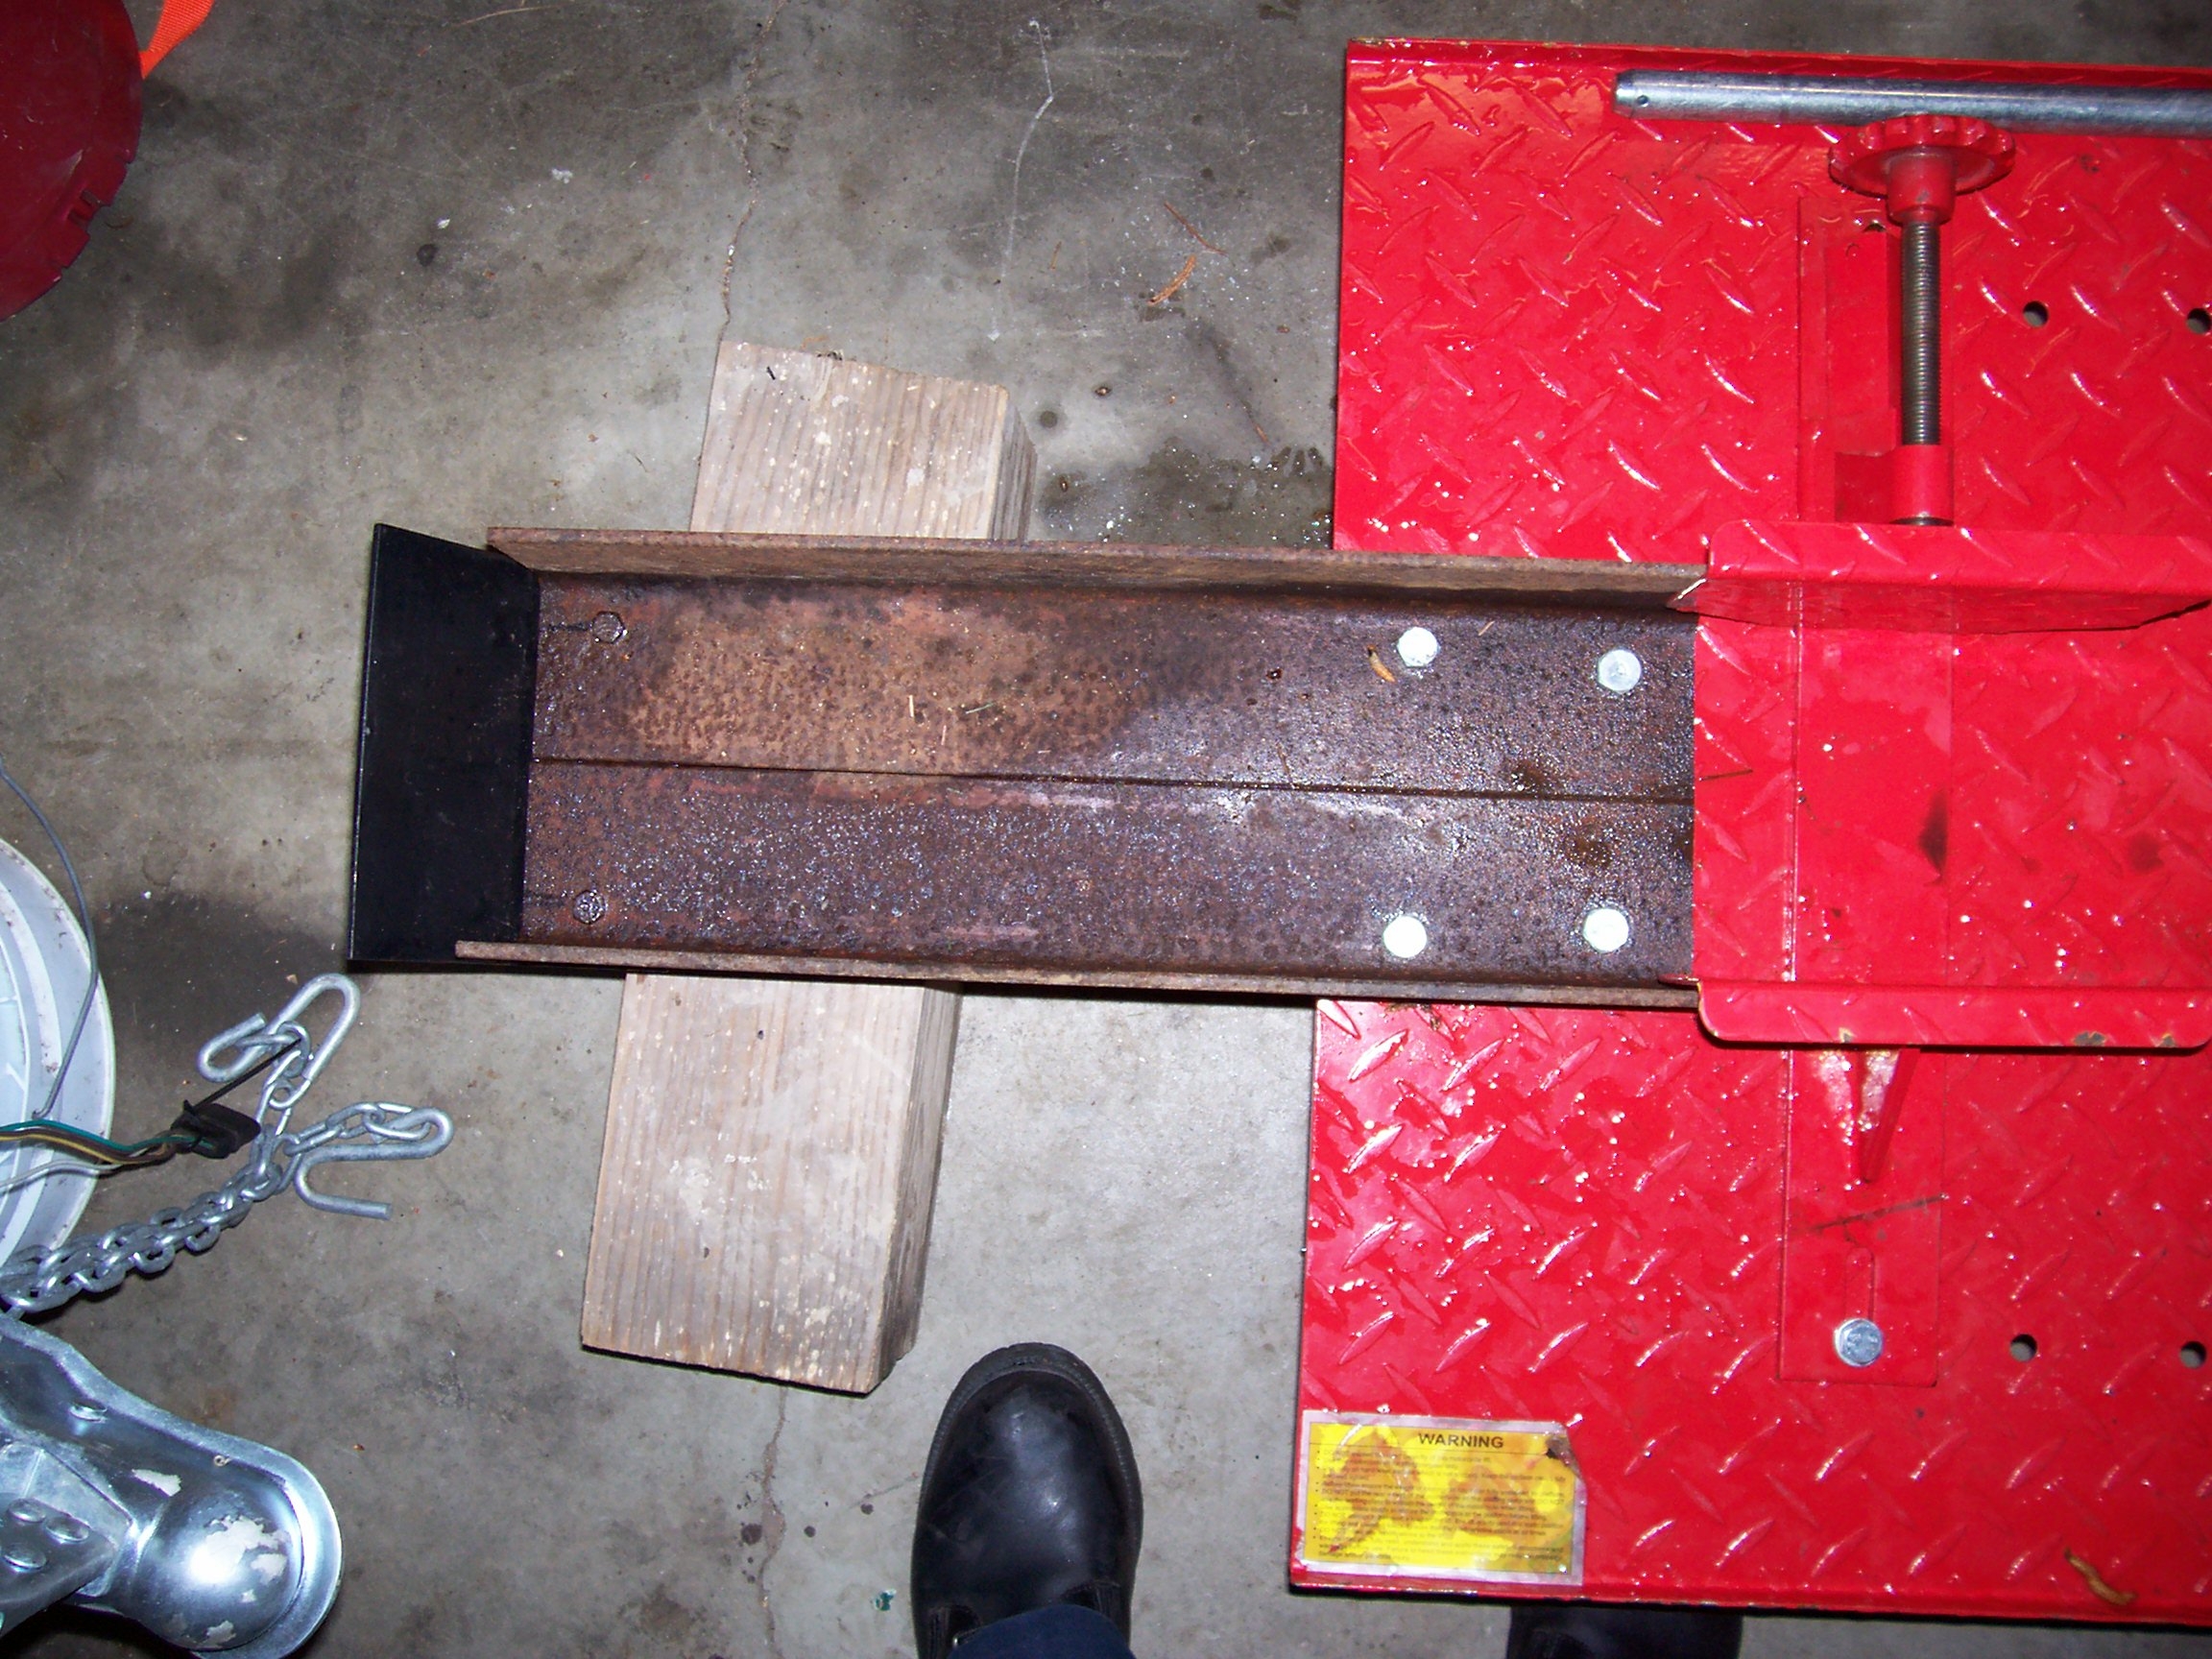
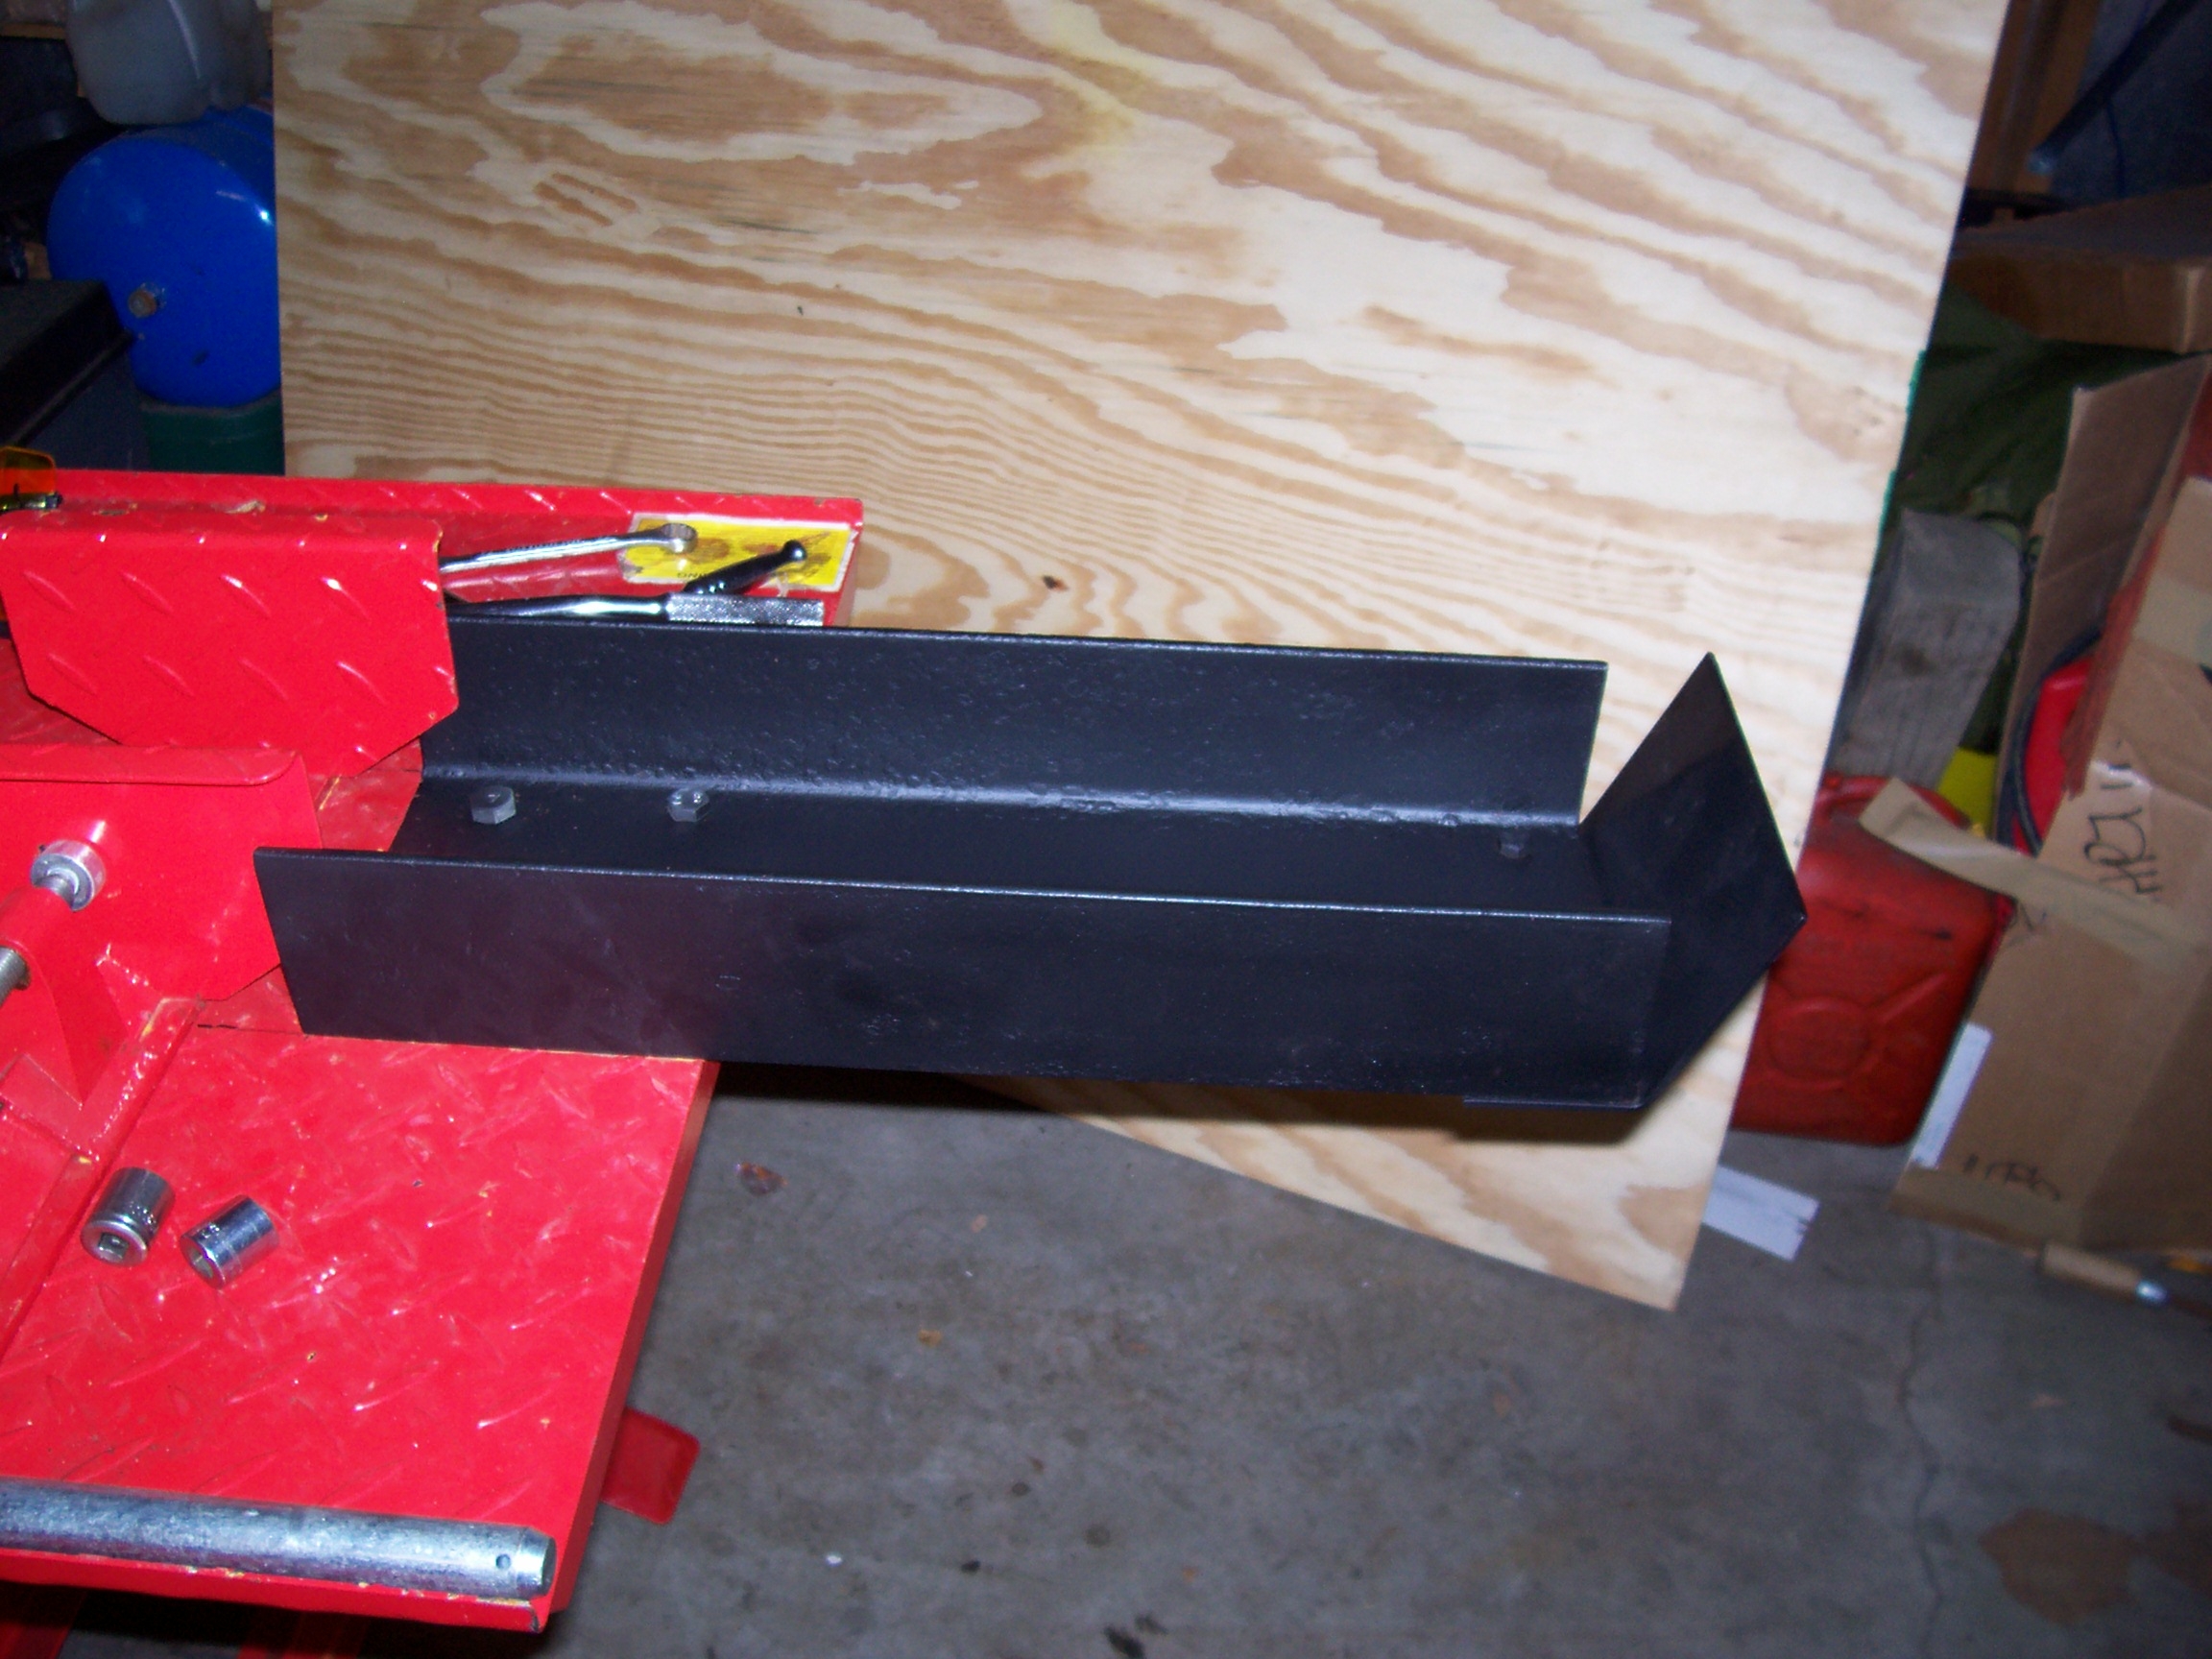
Using what we had on hand we built a 14 inch extension off the front of the lift.
We (he) had a piece of 3 1/2 inch angle iron that was 40 inches long. 3 1/2 inch angle iron is perfect for this job. I just wish it had been longer. More on that later.
First we removed the front stop.
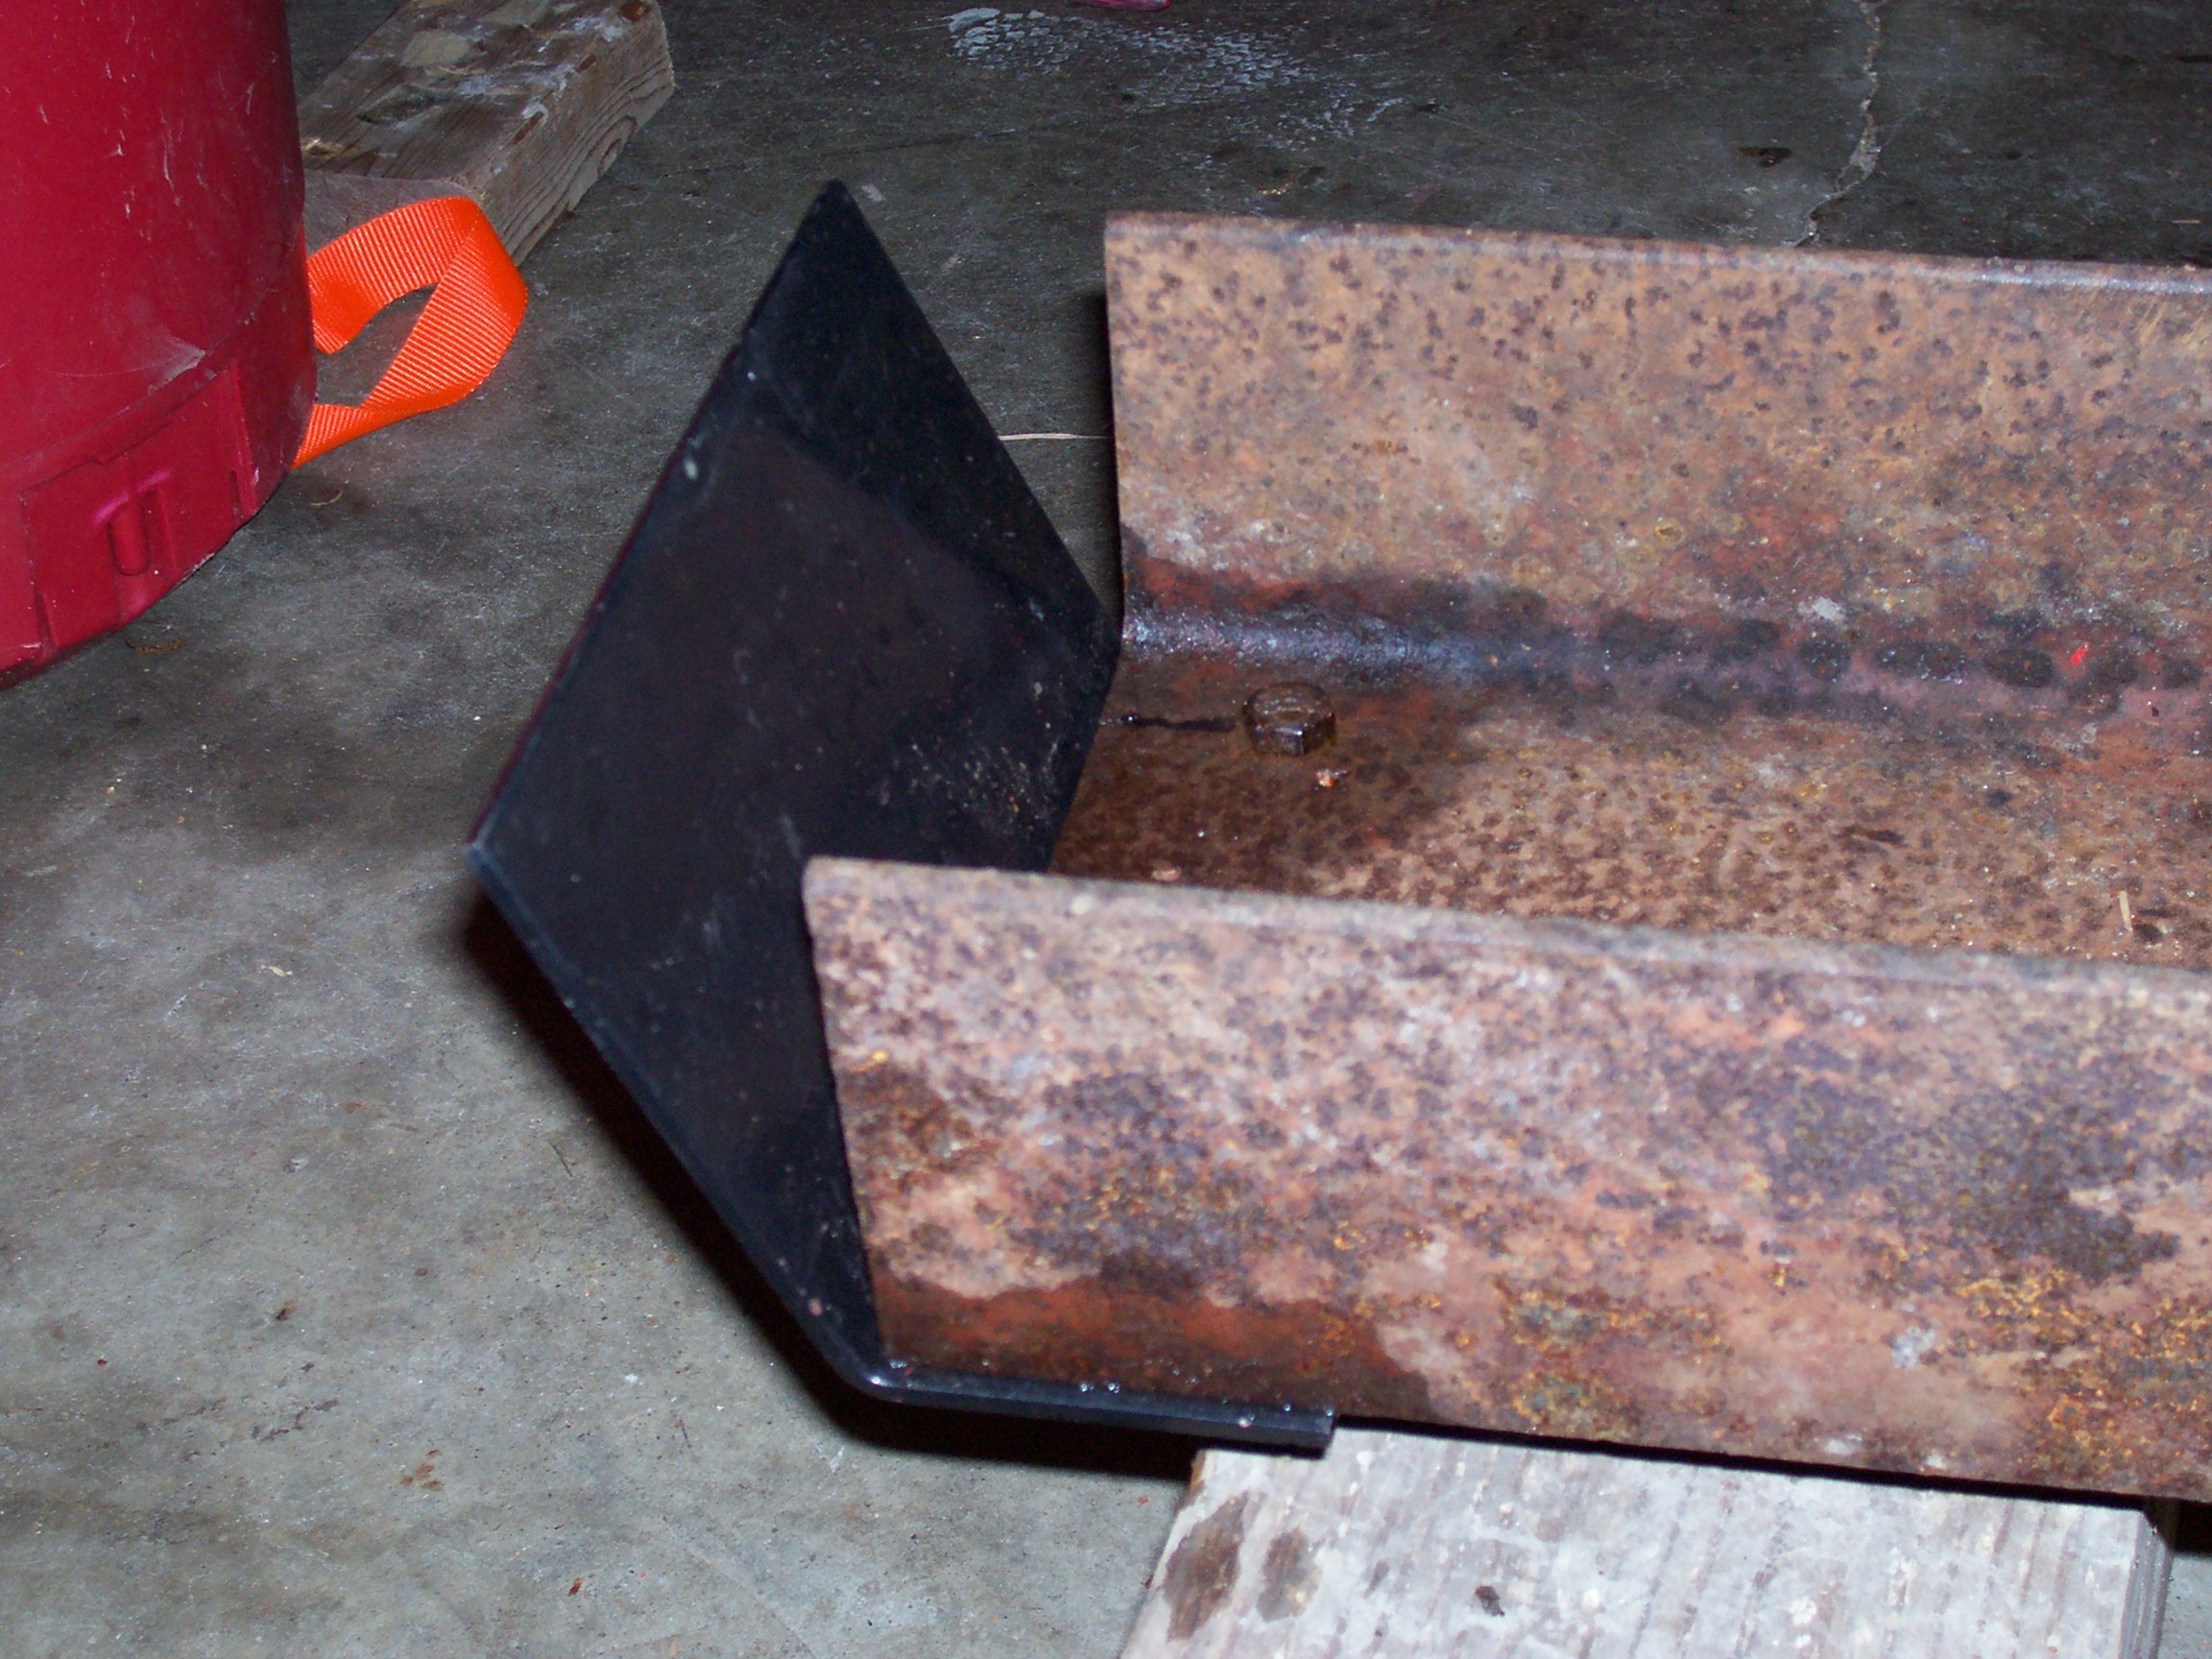
We cut the 40" piece of angle iron in half and then laid the two pieces on the table with 14 inches hanging over and 6 inches on the table. We drilled two holes that corresponded with the original stop holes in the table. Then we drilled two more holes a couple inches back through the angle iron and through the table, giving us a total of 4 holes to bolt through. To help reinforce we had a piece of aluminum angle iron and put it crossways under the table and drilled it to match the two rear-most holes. Lastly we put two holes at the front to re-attach the stop.
|
|
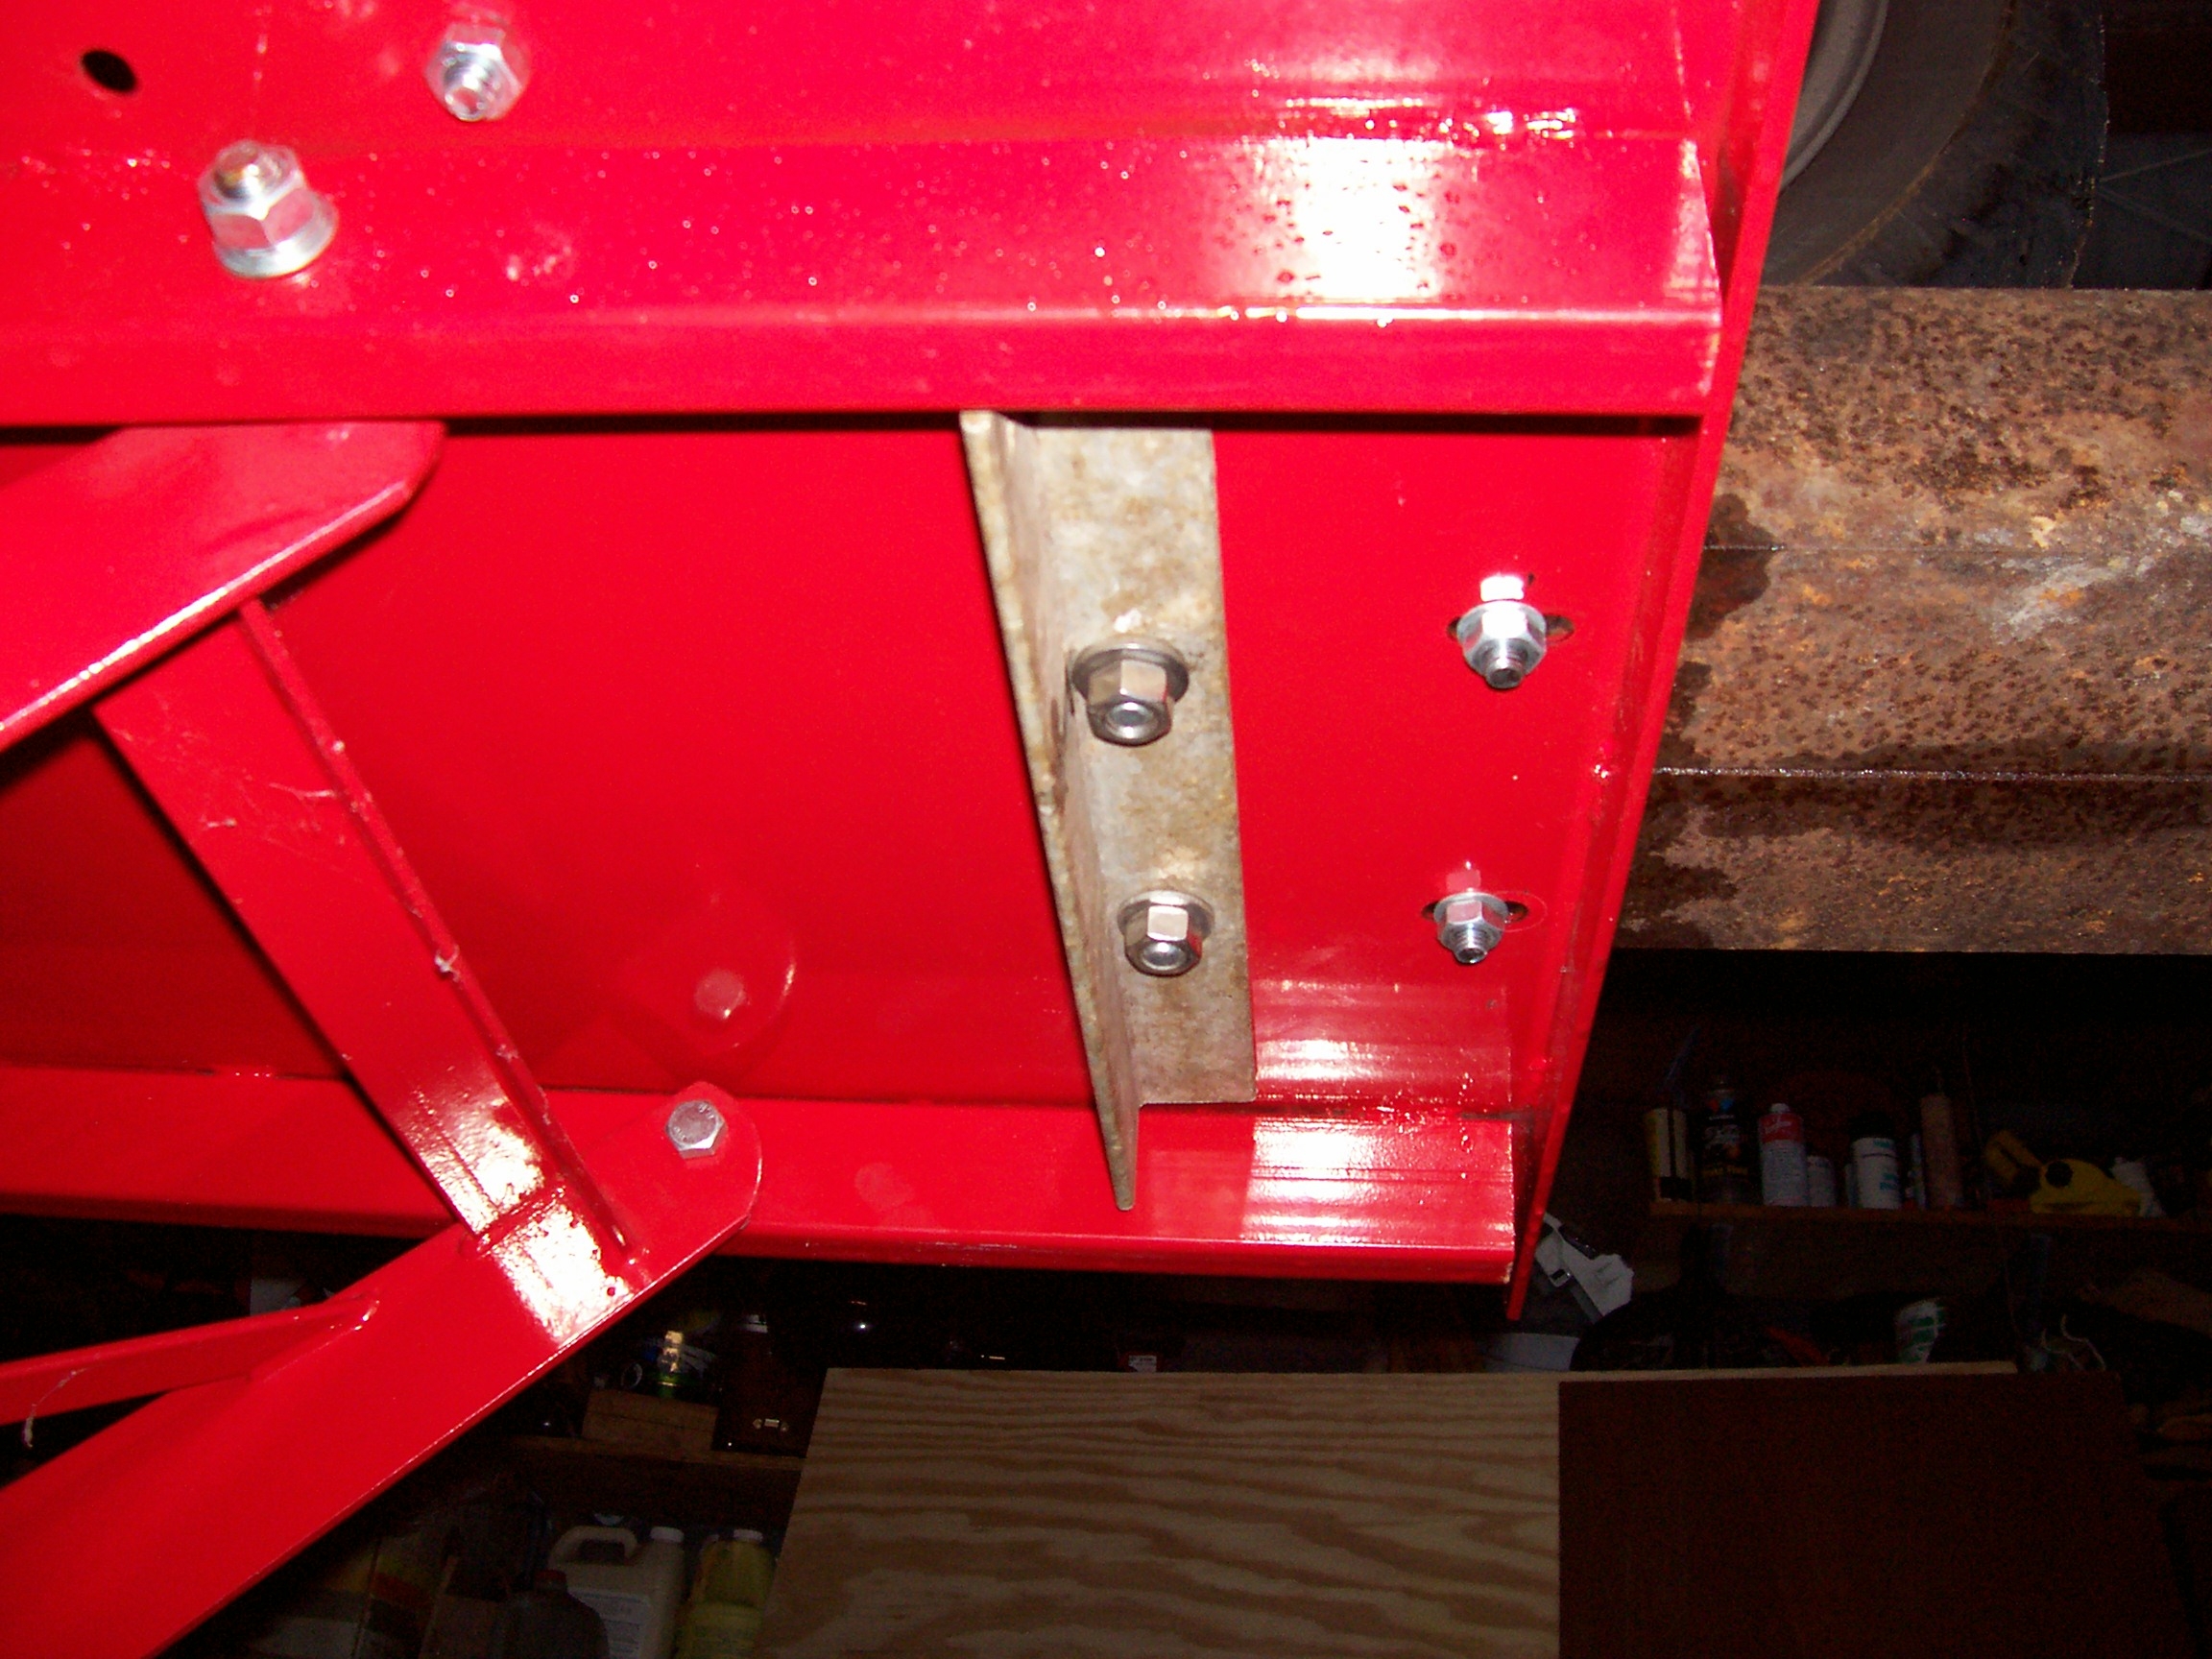
Left: The extension bolted in place.
Right: From the underside, the piece of angle iron for extra reinforcement.
|

|
Left: The stop attached to the front.
Right: Testing - The 6 inch overlap on the table doesn't give enough support for the weight of the bike. The front of the table bows downward signficantly when the bike is out on the extension. When rolling the bike out on the extension I support it with a 6x6 block of wood.
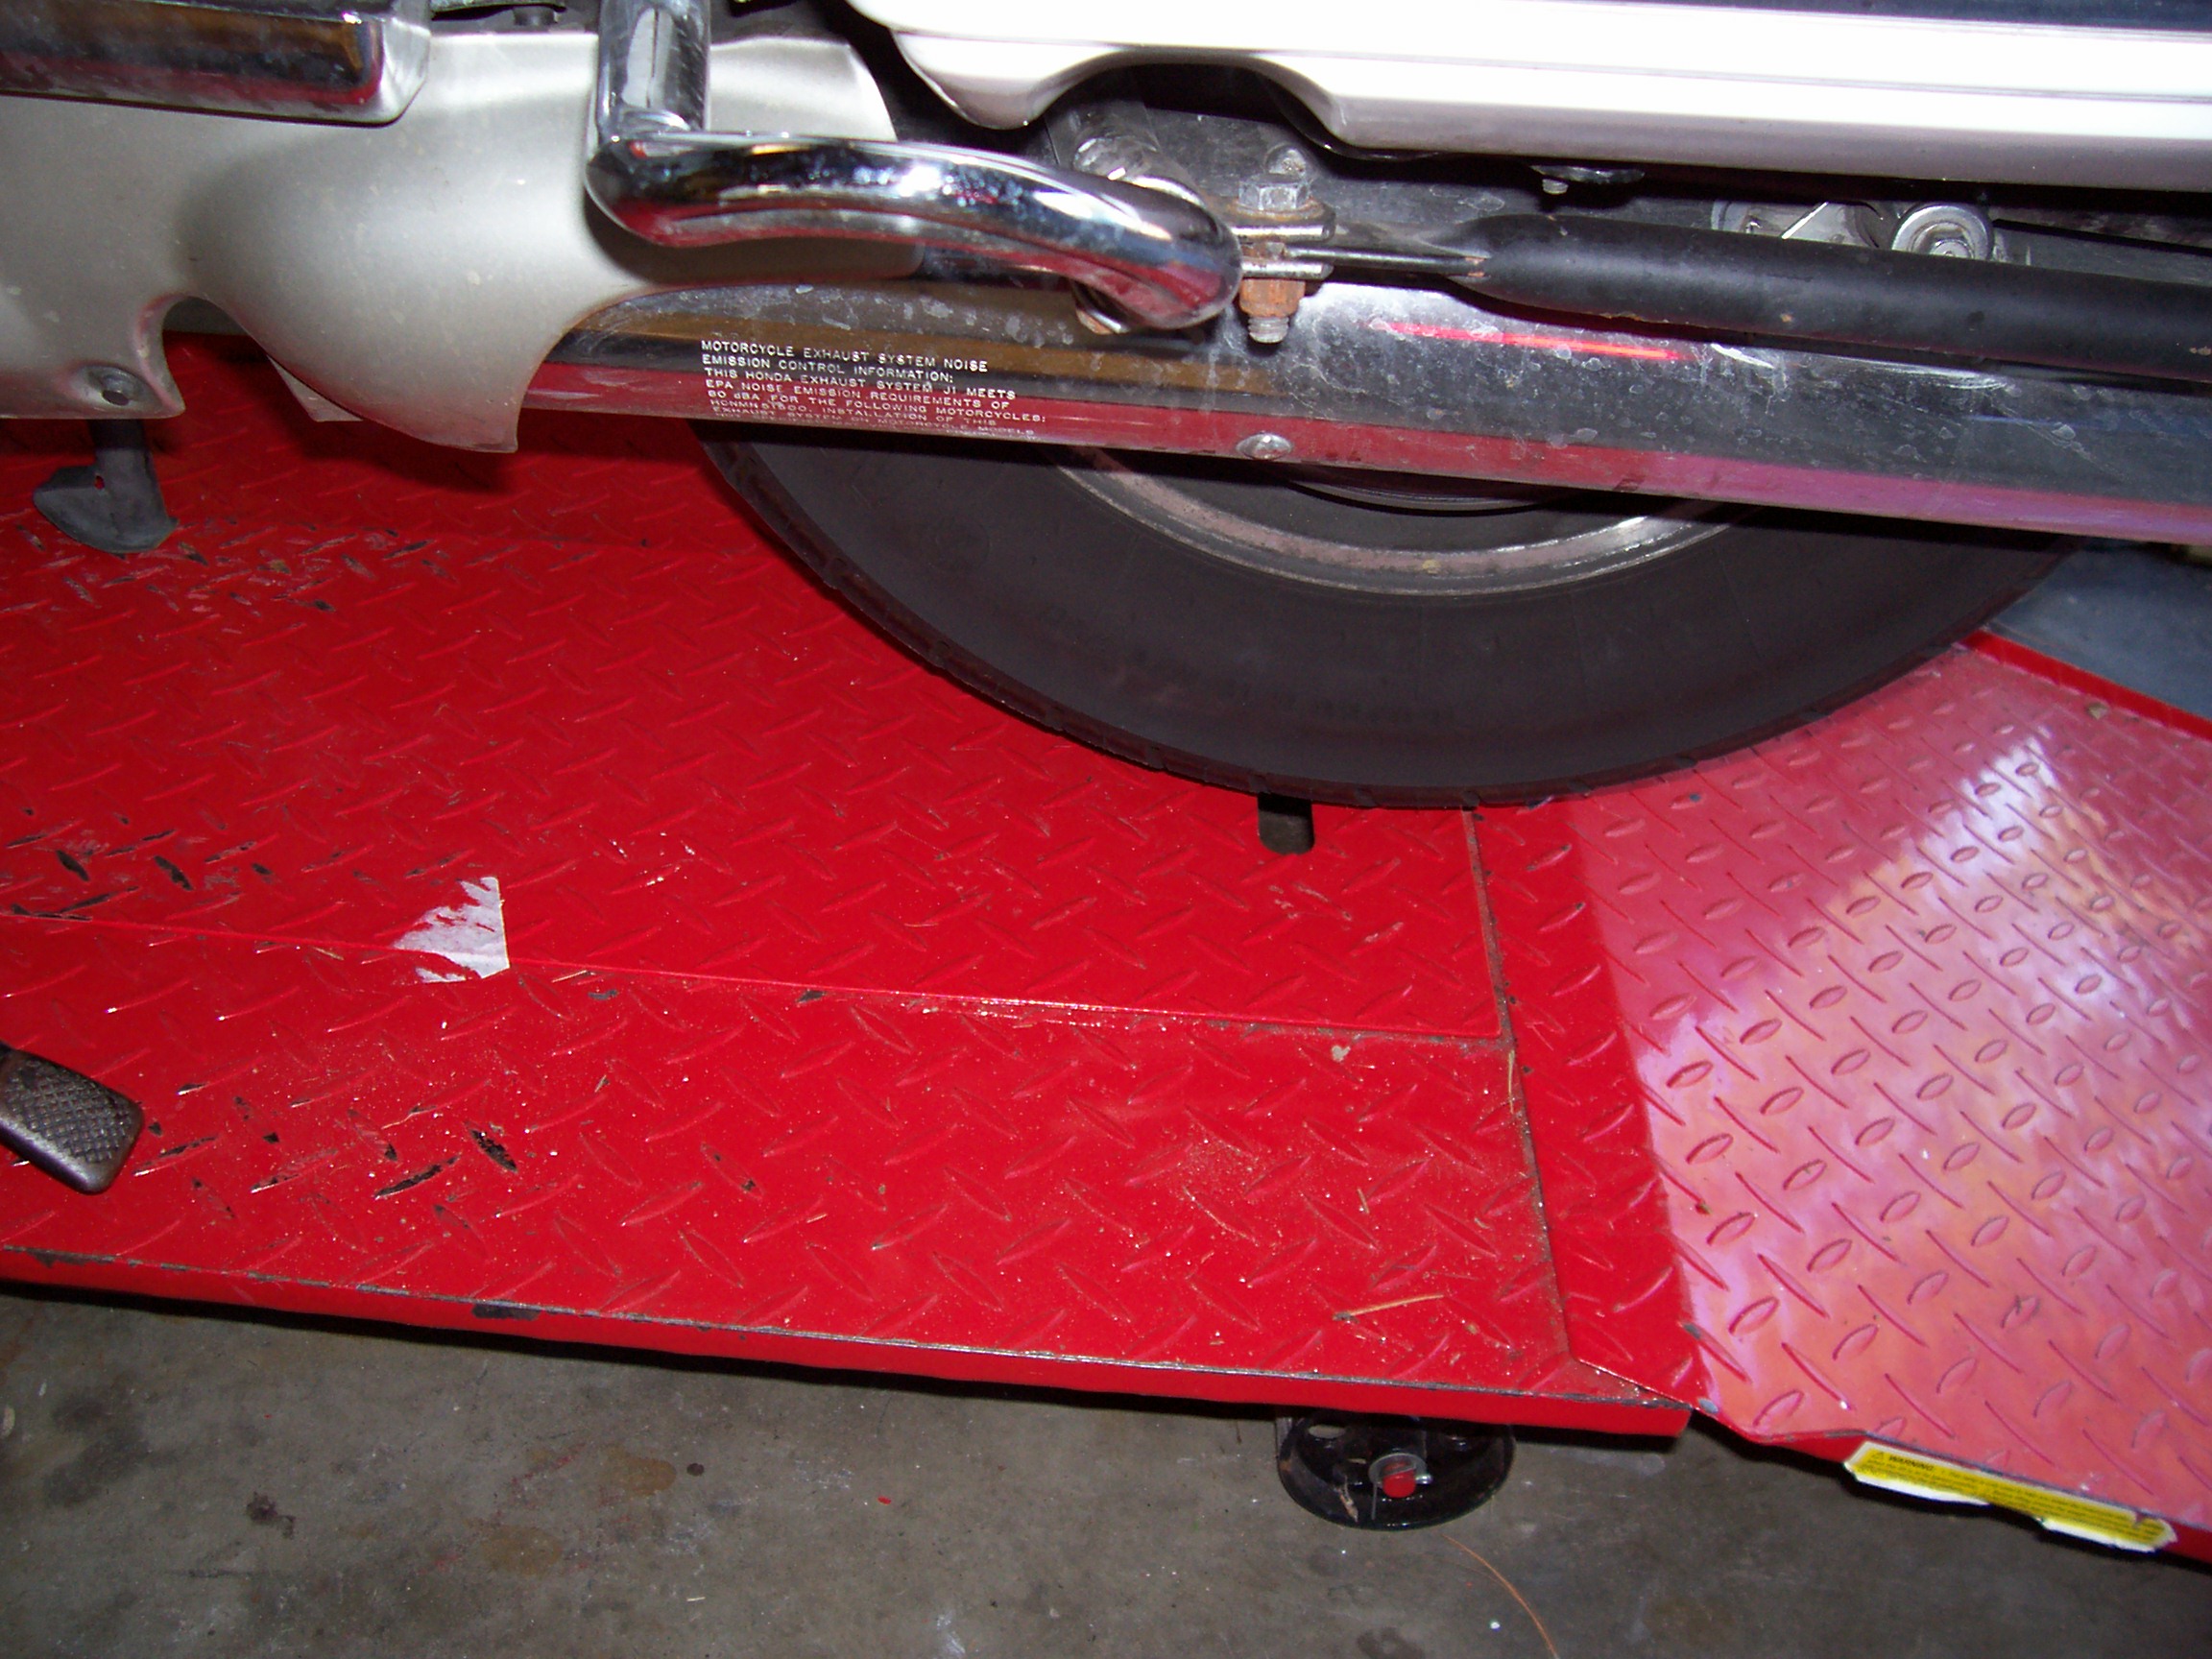
When the bike is positioned on the table as above, it is fine.
The front tire is only out on the extension while positioning the bike. When putting the bike on the centerstand, the wheel rolls back over the table.
The 14" overhang is actually more than I need. I may drill new holes and move the extension back until it touches the vice.
|
|
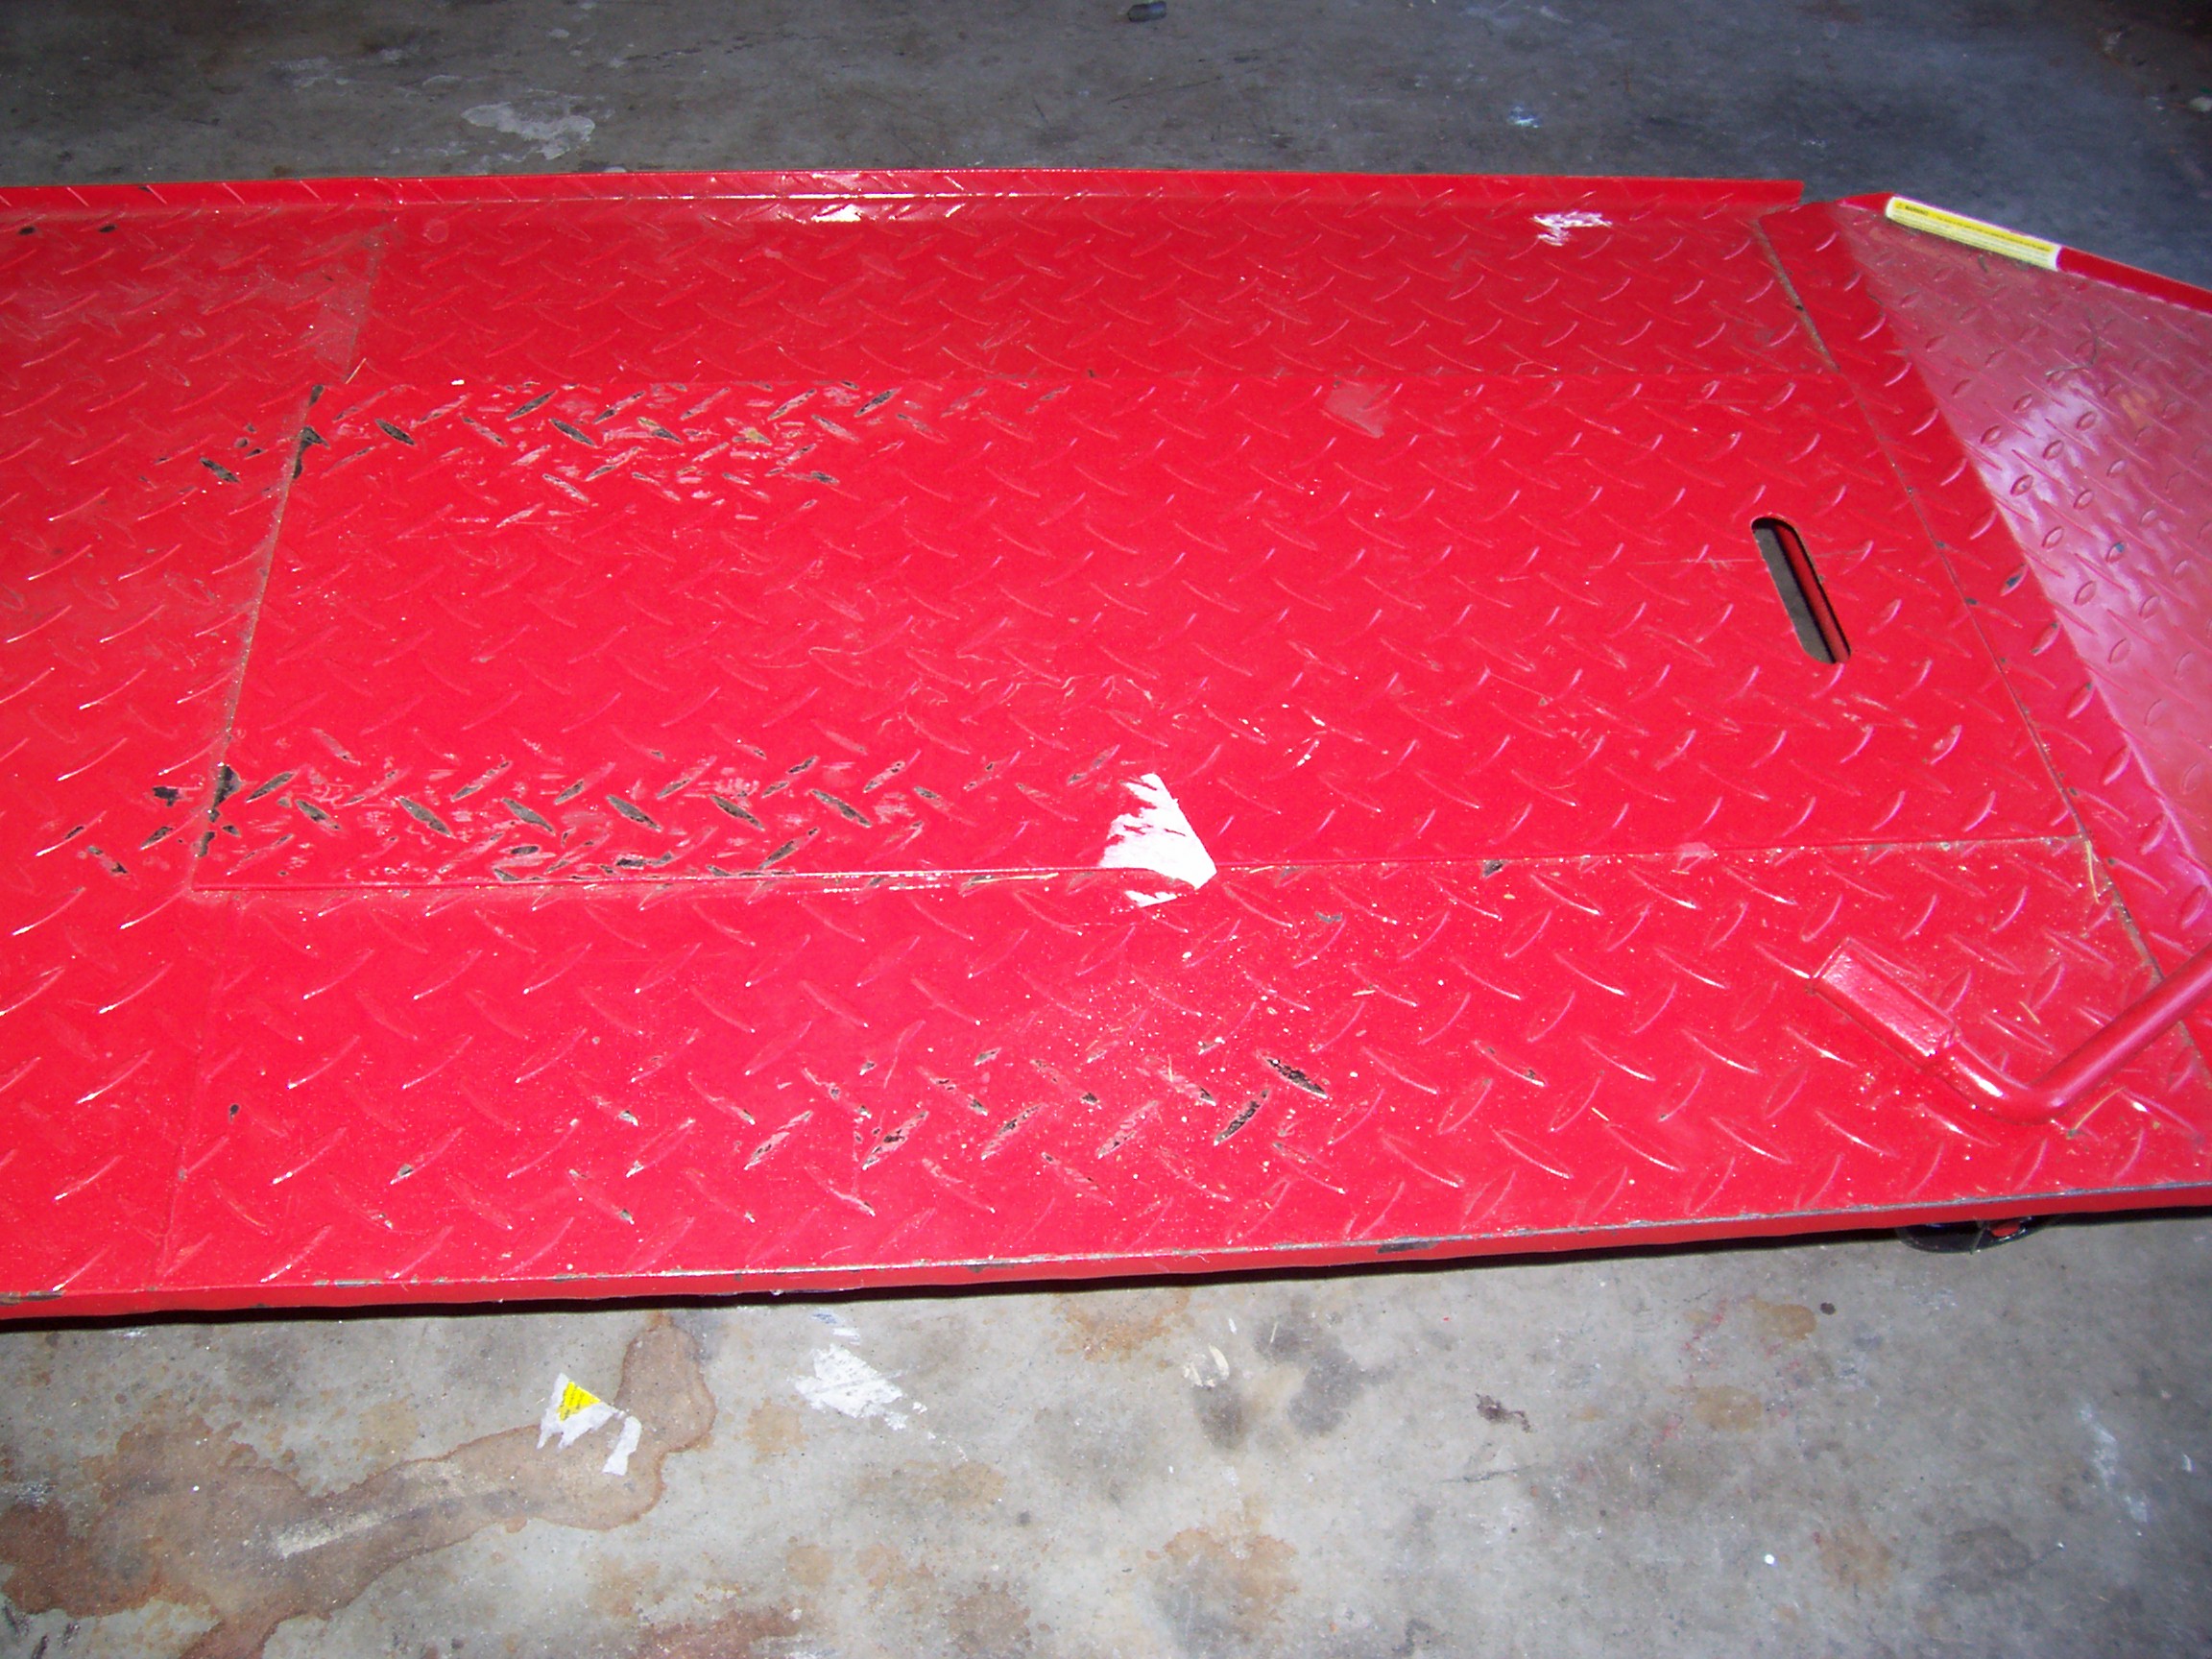
After cleaning and painting.
|
|
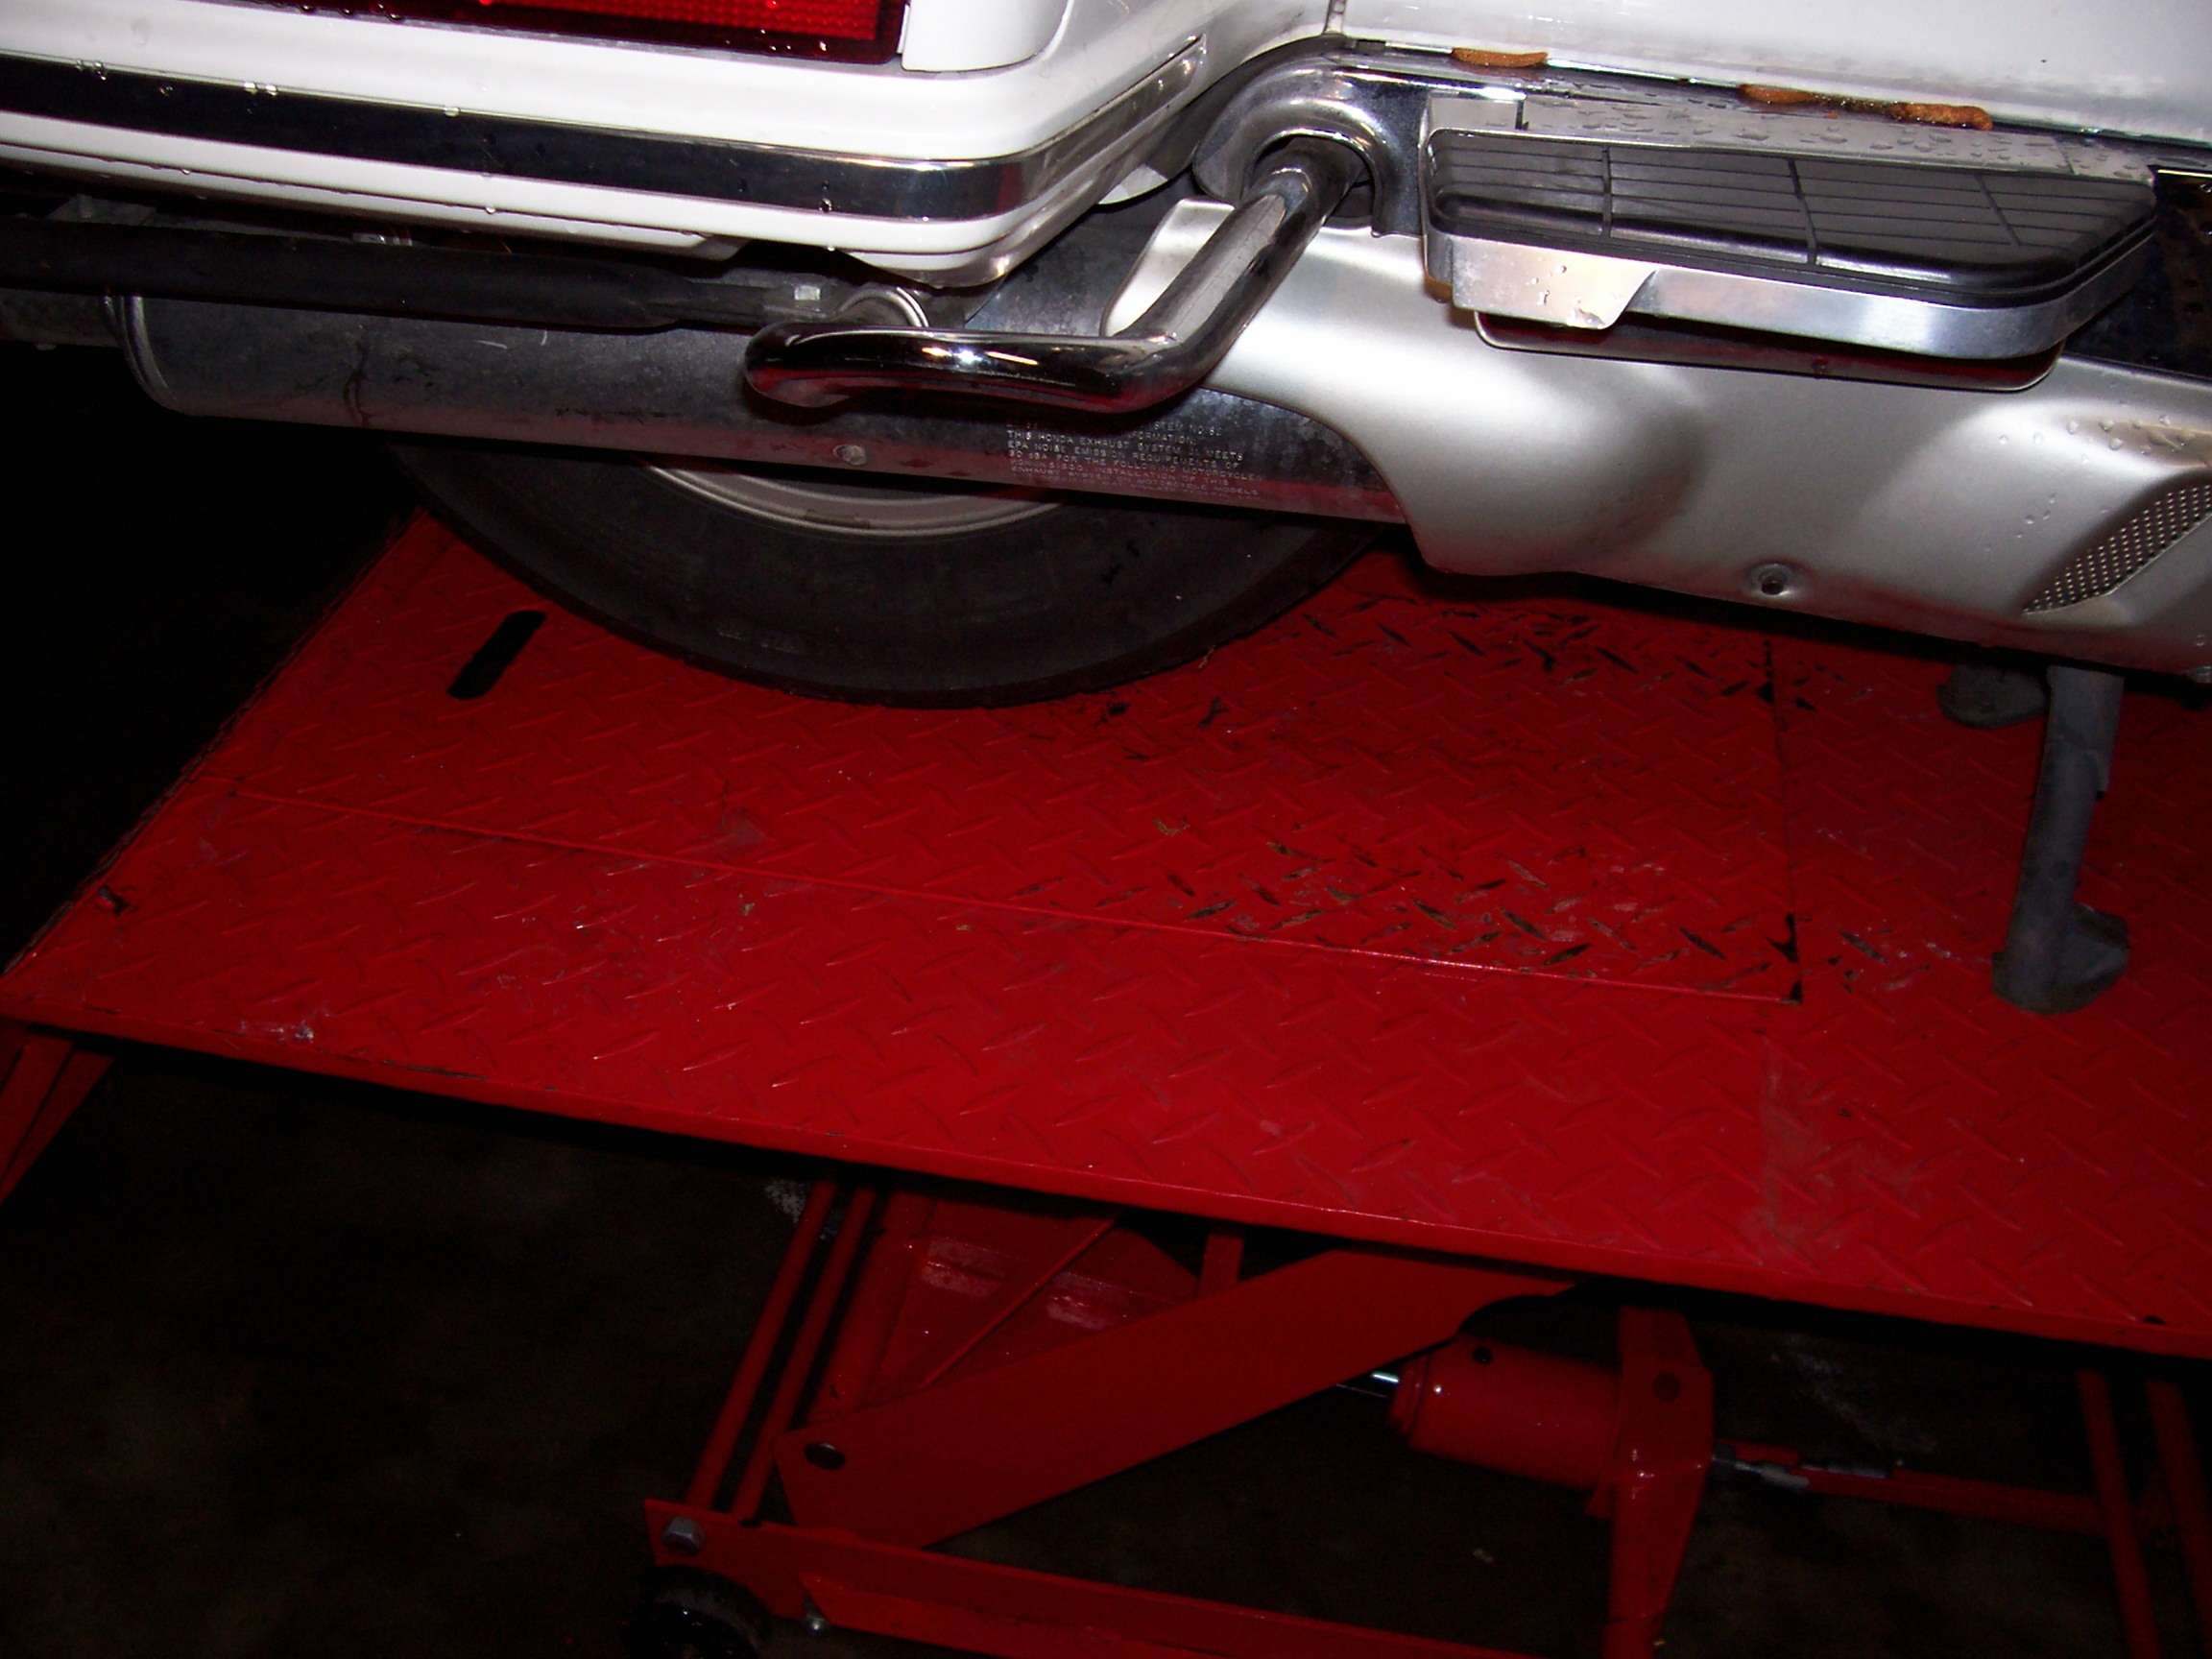
Left: The center stand is now clear of the removable plate.
Right: The plate is removable now, allowing change of the rear tire.
I have since actually changed my tire. I set the bike up about 3" farther forward than in this picture to ensure room to the rear.
Return to: Jim's Goldwing page.
Click here to E-mail me.